Published On:
20 Fall Window Painting Ideas to Try This Autumn
Share:


Fall is the perfect time to bring warm colors and seasonal details into your home. While pumpkins on the porch and cozy throws are popular choices, your windows can also become part of your autumn decor. A few painted leaves, pumpkins, acorns, or branches can turn plain glass into a fun seasonal feature.
You do not need to be an artist to try these fall window painting ideas. Many designs use basic shapes, simple outlines, and a small mix of autumn colors. For temporary designs, use paint made for removable window decorating, such as washable window paint or tempera, and test it on a small hidden area first. Keeping part of the glass clear also lets natural light continue to enter the room.
1. Paint Falling Maple Leaves Around the Window
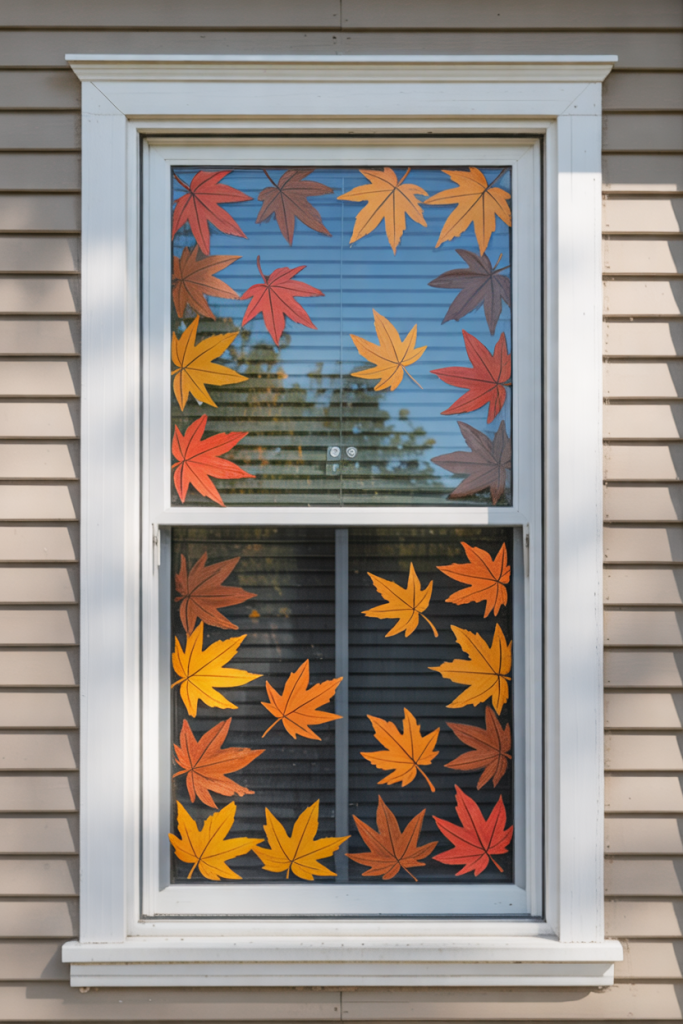
Start with one of the easiest fall designs: colorful maple leaves drifting around the edges of the window. Use burnt orange, mustard yellow, deep red, brown, and a little muted green to create a natural autumn palette.
Paint larger leaves near the lower corners and make them gradually smaller as they travel upward. Turn each leaf in a slightly different direction so they appear to be moving in the wind. You do not need to paint the entire window. Leaving the center mostly clear will make the design stand out while still allowing plenty of daylight into the room.
2. Create a Pumpkin Patch Along the Bottom
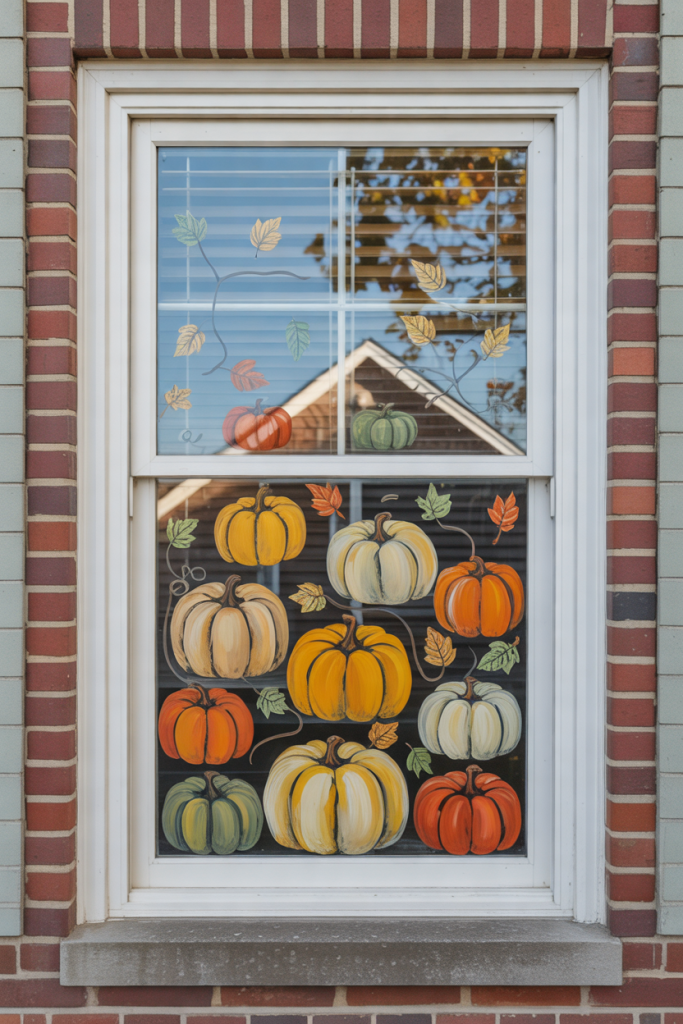
Turn the lower part of your window into a tiny pumpkin patch. Start with several pumpkins in different sizes instead of making a straight row of identical orange shapes.
Mix classic orange pumpkins with cream, muted green, and rust-colored ones. Overlap a few pumpkins slightly and add brown stems, curling vines, and several fallen leaves between them. Use darker shades along the curved sections of each pumpkin to give them a little depth. Keeping the painting along the bottom makes this design noticeable without blocking the entire outdoor view.
3. Paint Autumn Leaves in Two Opposite Corners
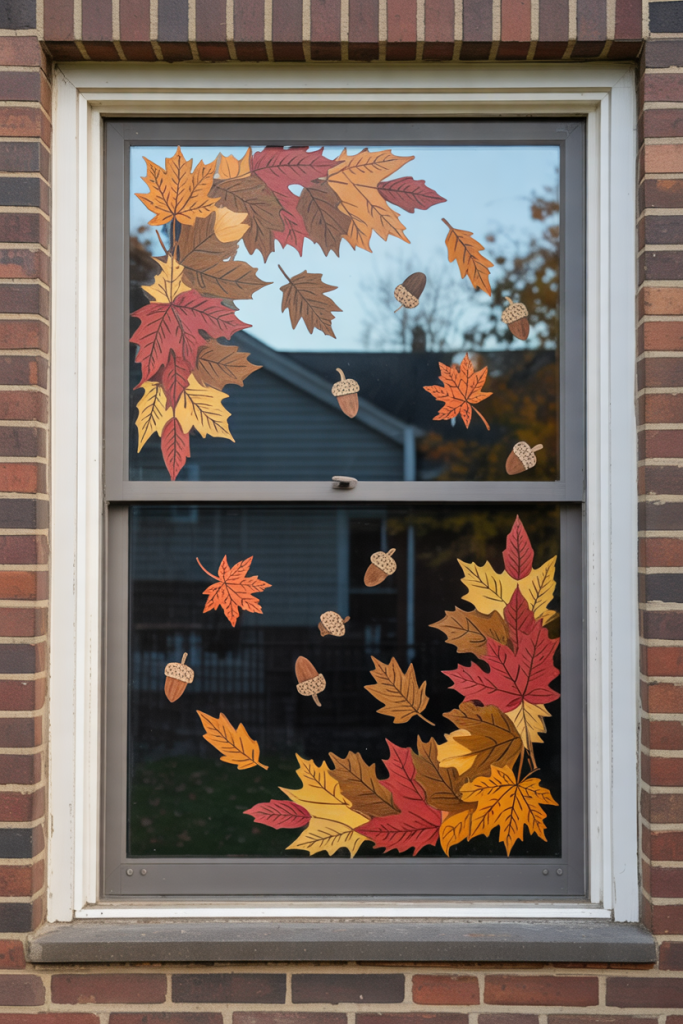
You do not have to cover every edge of the glass to make a window look ready for fall. Instead, create one cluster of autumn leaves in the upper corner and another in the opposite lower corner.
Combine maple and simple oval-shaped leaves in red, orange, mustard, brown, and muted green. Add thin branches, a few berries, or tiny acorns to make the clusters more interesting. Paint a handful of loose leaves between the two corners to connect the design. The large amount of clear glass between the painted areas keeps the finished window light and balanced.
4. Create a Fall Leaf Border
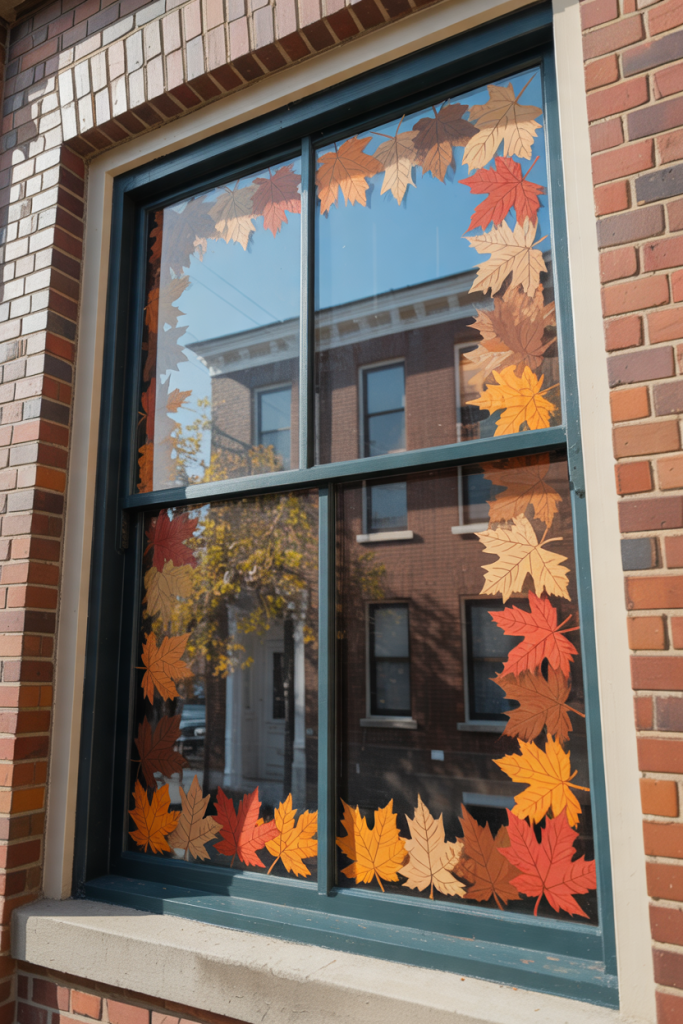
Frame the window with a loose border made from colorful autumn leaves. Paint leaves around two, three, or all four edges depending on the size of your window.
Mix several leaf shapes rather than repeating the same one. Maple leaves can sit beside simple oak and oval leaves. Change their sizes, angles, and colors so the border looks natural instead of perfectly patterned. You can also add thin branches between some of the leaves. Keep the border fairly narrow so the painted design frames the outdoor view instead of hiding it.
5. Paint a Pumpkin and Sunflower Corner
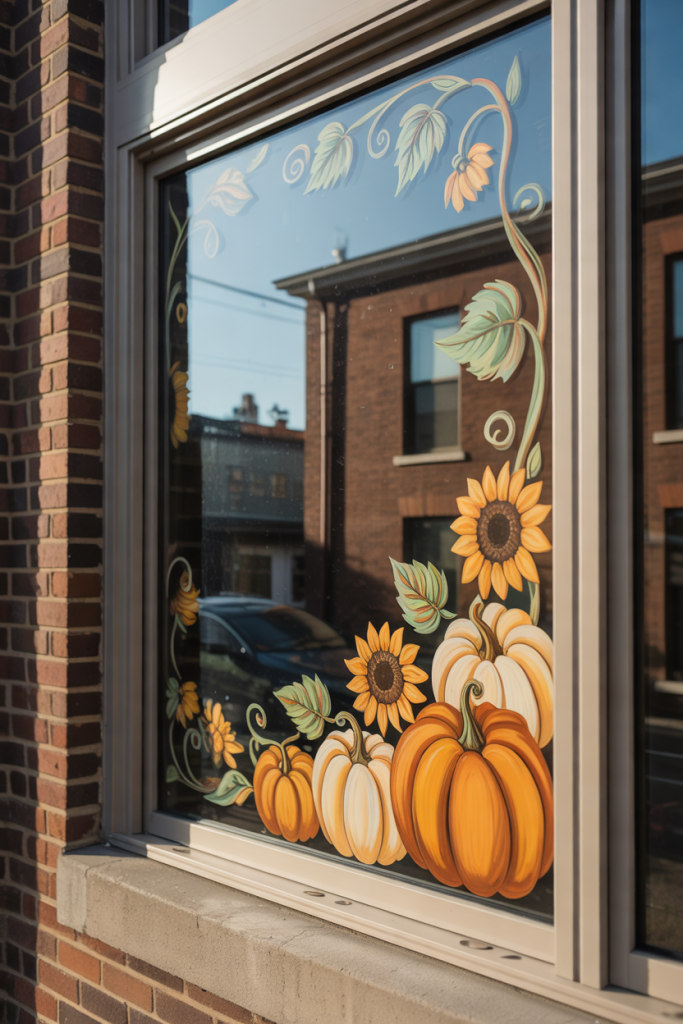
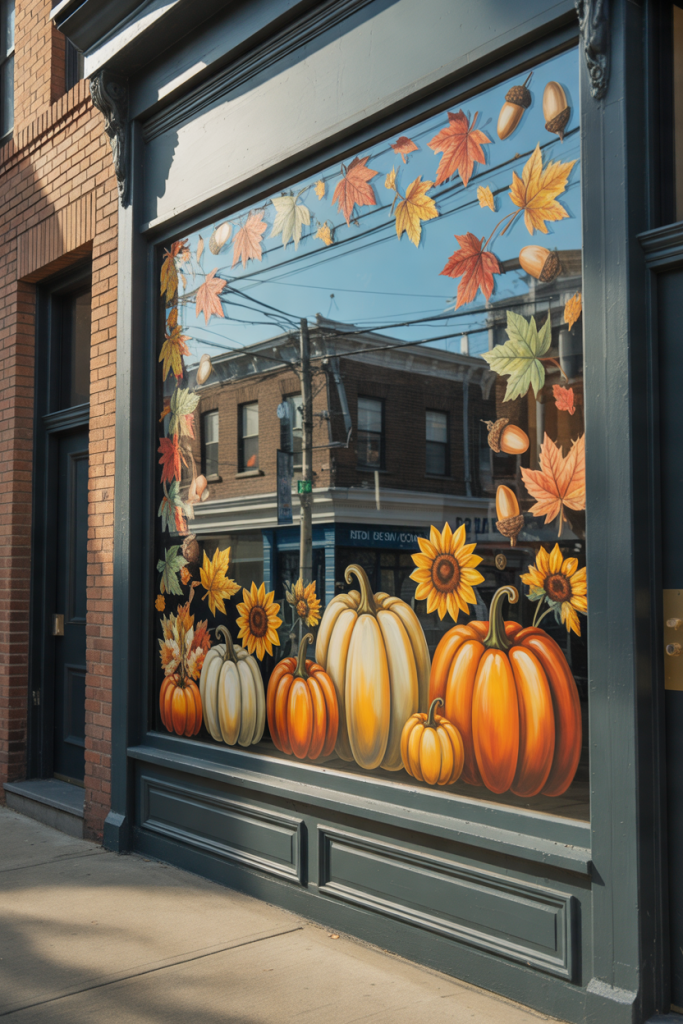
Combine two familiar harvest elements by painting pumpkins and sunflowers in one lower corner of the window. Start with two or three pumpkins, making one larger than the others.
Paint golden sunflowers behind the pumpkins and allow a few stems and leaves to extend upward along the side of the glass. Add smaller autumn leaves around the arrangement to soften the edges. Orange pumpkins, golden flowers, brown centers, and muted green leaves create a warm palette without needing lots of different paint colors. This arrangement works particularly well on kitchen and dining room windows.
6. Paint an Acorn and Oak Leaf Garland
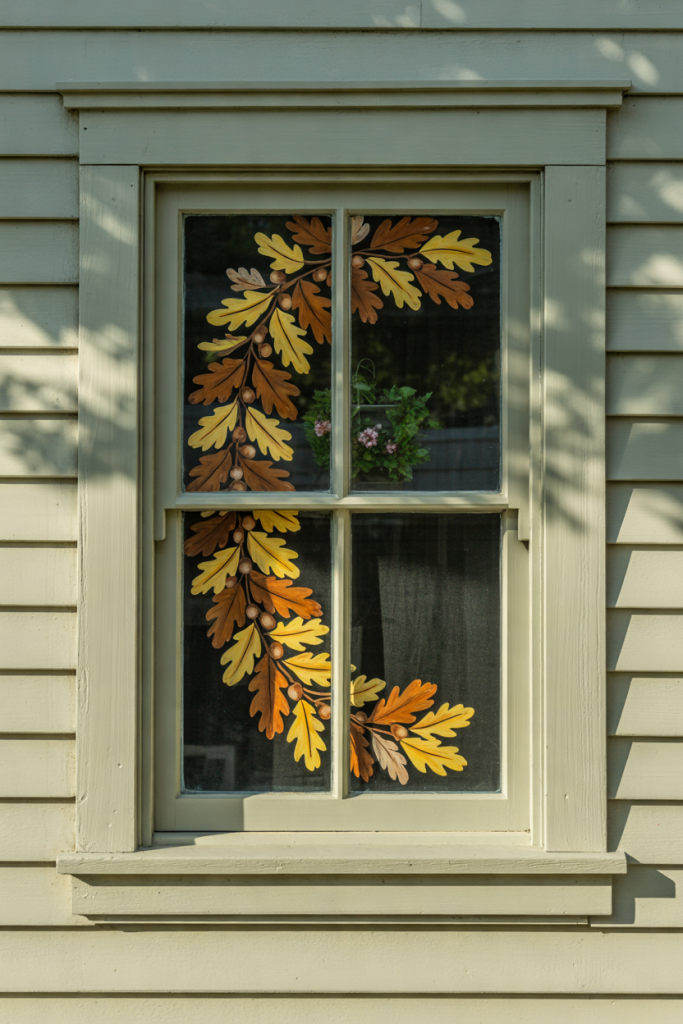
Create a simple painted garland across the top of the window using oak leaves and acorns. Begin with a loose curved branch rather than trying to make a perfectly straight line.
Add clusters of rust, mustard, orange, and brown oak leaves along the branch. Paint small acorns between them using simple oval shapes with darker caps. Allow a few leaves to hang slightly lower than the others for a relaxed look. Because most of the artwork stays near the top of the glass, the window can still provide plenty of natural light and a clear outdoor view.
7. Create Falling Leaves Blowing in the Wind
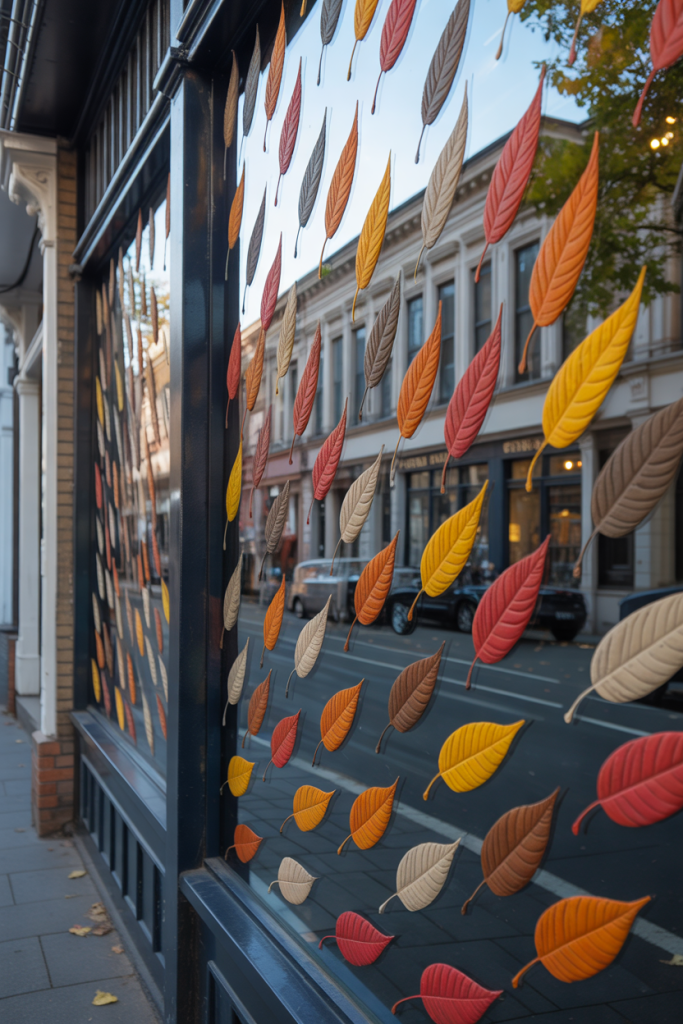
Instead of creating a border, make the leaves look as though an autumn breeze is carrying them across the window. Paint a loose trail moving diagonally from one corner toward another.
Use leaves in different sizes and rotate them in several directions. Some can be fully painted in red, orange, or yellow, while others can use simple outlines. Leave uneven gaps between them instead of placing every leaf at the same distance. A curved trail will create more movement than a straight line and makes the design feel like leaves are actually blowing across the glass.
8. Paint an Autumn Wreath on the Glass
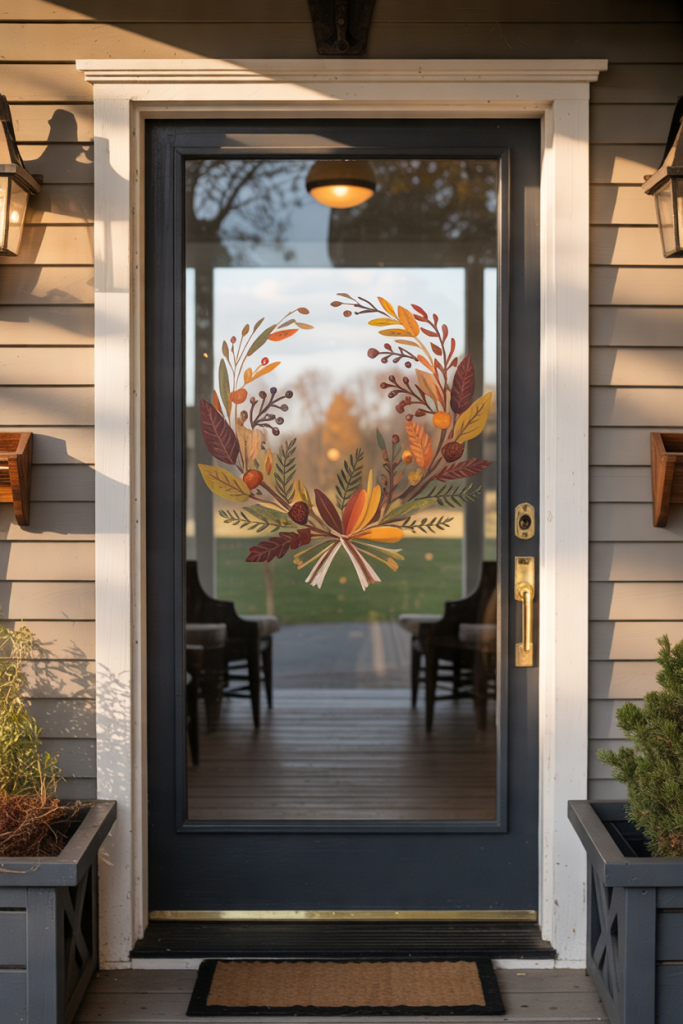
Paint a fall wreath directly onto the center of a smaller window or glass door. Begin by lightly planning a large circle, but do not worry about making it perfectly round.
Build the wreath from autumn leaves, thin branches, berries, and small acorns. Use burnt orange, burgundy, mustard, olive green, and brown to keep the colors connected. Leave the middle of the wreath transparent rather than painting a solid center. You can also make one side slightly fuller than the other for a more relaxed, handmade appearance.
9. Try White Pumpkin Line Art
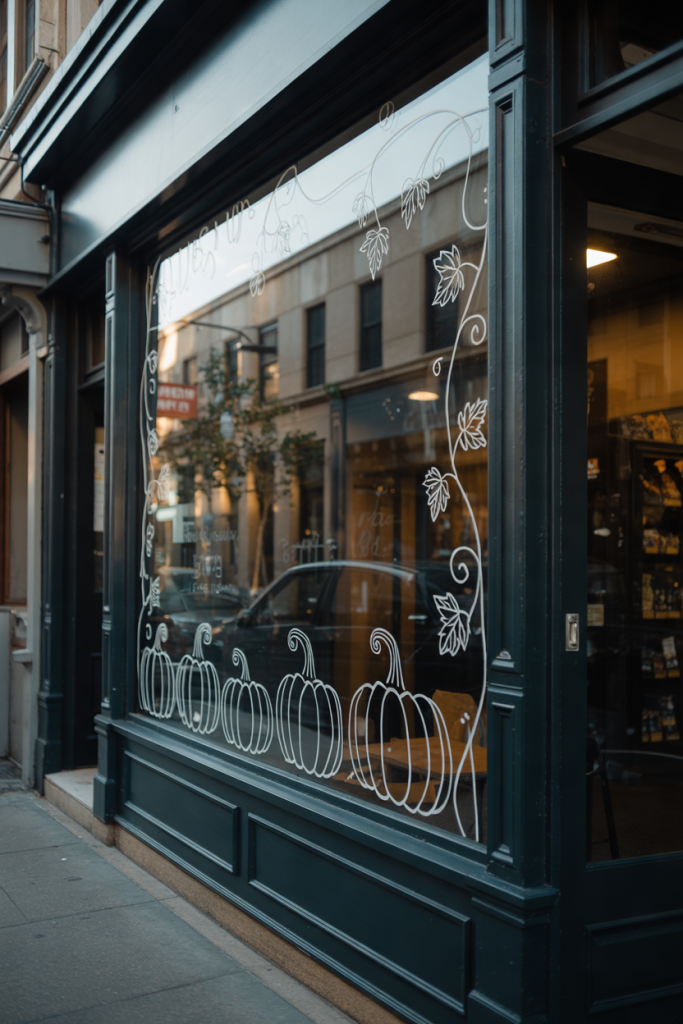
Colorful paint is not the only way to decorate a fall window. White line art can create a simple autumn design that looks especially striking on glass with a darker interior or outdoor background.
Use a suitable removable white window marker or paint to draw several pumpkin outlines along the lower edge. Add curved lines inside each pumpkin to show its sections, followed by simple leaves and curling vines. You can continue a few vines upward along one side of the window. Because you are drawing outlines rather than filling large shapes, this idea can be quicker and less messy than a full-color design.
10. Paint a Woodland Fox and Fall Leaves
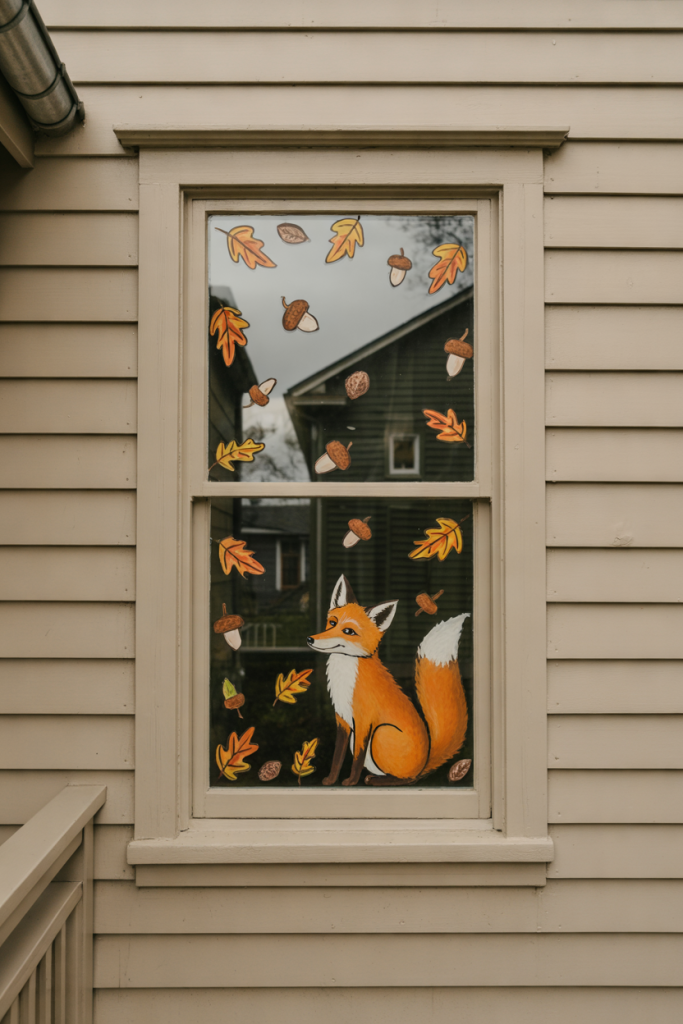
Create a playful woodland scene in one bottom corner of the window. Paint a small orange fox sitting among autumn leaves, acorns, and a few mushrooms.
Keep the fox simple rather than trying to create a highly realistic animal. Basic curved shapes, pointed ears, a white chest, and a fluffy tail are enough to make it recognizable. Let colorful leaves travel upward along one side of the glass and become smaller as they rise. Keeping the woodland scene concentrated in one corner prevents the design from becoming too difficult or covering too much of the window.
11. Create a Harvest Moon and Tree Silhouette
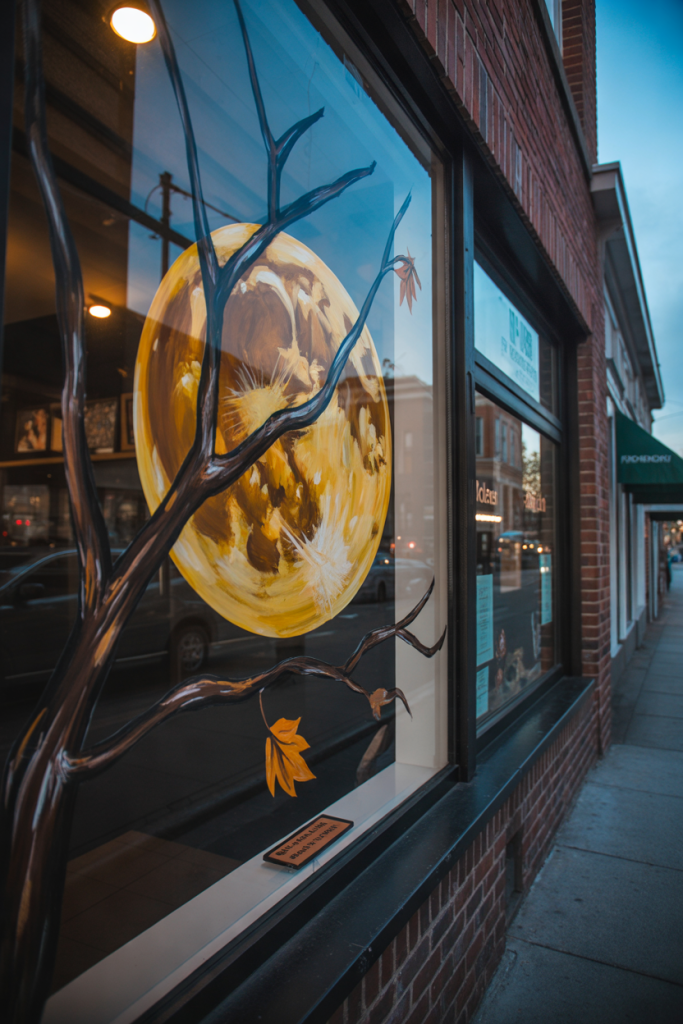
Give your fall window a more atmospheric look with a large golden harvest moon. Paint the moon toward one side of the window instead of directly in the middle.
Once the moon has dried, add dark brown or black tree branches crossing part of it. Keep the branches simple and add only a handful of small autumn leaves. You could also paint a few tiny leaves drifting away from the tree. This design looks especially effective in the evening when warm indoor lighting helps the painted moon and darker silhouette create a stronger contrast.
12. Paint an Apple Orchard Scene
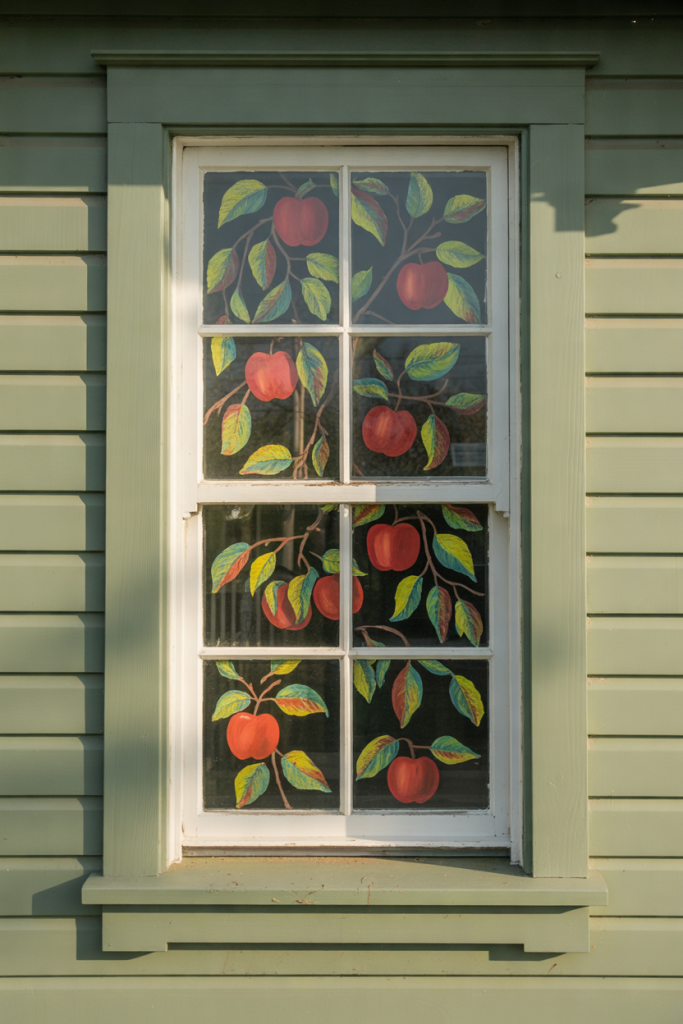
Apples provide another way to decorate for autumn without using pumpkins everywhere. Create a simple apple tree branch extending from one side of the window.
Paint several red apples hanging from the branch and surround them with leaves in green, yellow, orange, and brown. On a larger window, you could continue the idea along the bottom with a few simplified tree shapes and fallen apples. Keep the artwork around the edges or lower portion of the glass so the real outdoor scenery can remain visible behind your painted orchard.
13. Paint Sunflowers Across the Bottom
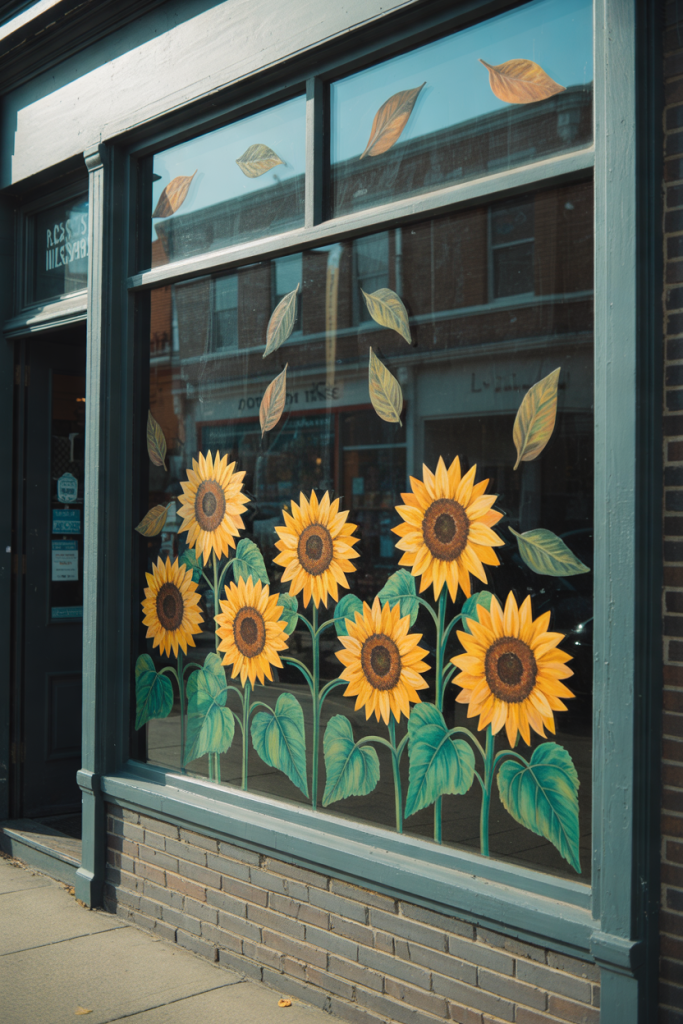
Large sunflower shapes can create an eye-catching harvest design without requiring detailed drawing skills. Start by painting several dark brown circles along the bottom section of the window.
Add golden yellow petals around each center and vary the size of the flowers. Include green and brown leaves between them and allow a few stems to curve naturally instead of standing perfectly straight. You can add a couple of scattered autumn leaves above the flowers to connect them with the season. Keep the upper part of the window mostly clear to balance the bold flowers below.
14. Create a Pumpkin, Gourd, and Leaf Display
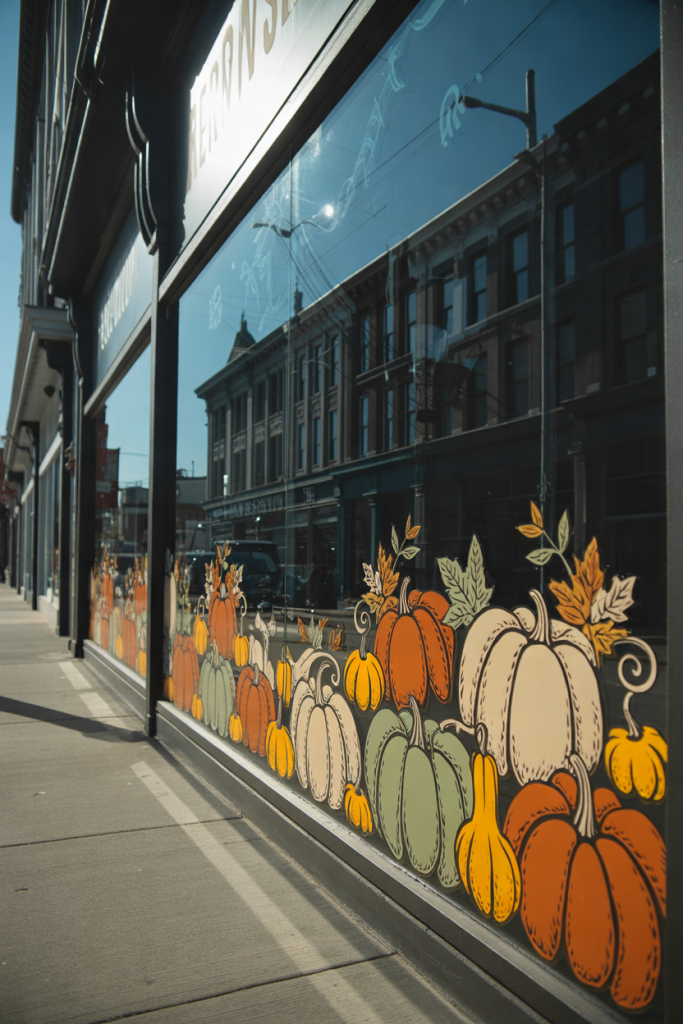
Make your painted harvest display more interesting by combining pumpkins with different kinds of gourds. Arrange them across one bottom corner or along part of the lower window.
Paint round orange pumpkins beside tall cream pumpkins, small green gourds, and rust-colored shapes. Add curling vines and autumn leaves between them to connect the arrangement. Avoid making every item the same height. Taller shapes at the back and smaller ones toward the front can make the painted display feel more layered, even though everything is painted on one flat surface.
15. Paint a Friendly Scarecrow Harvest Scene
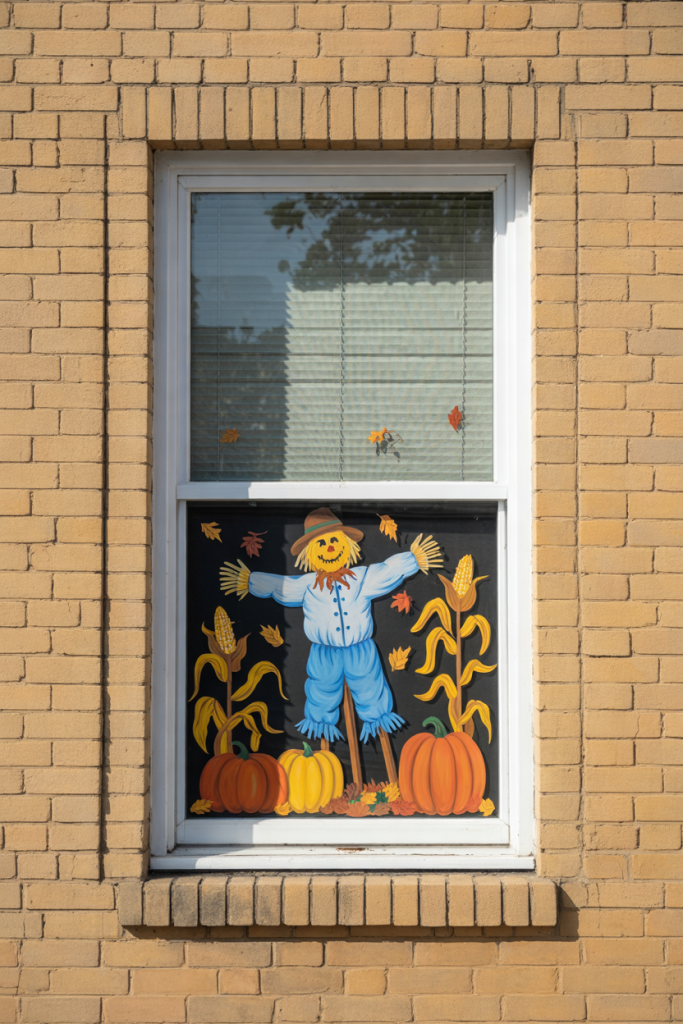
A simple scarecrow can bring a playful country feel to a larger window. Place the scarecrow toward one side instead of filling the center of the glass.
Build it from easy shapes: a round face, triangle-style hat, straight arms, and simple clothing. Add a few pumpkins around the bottom and paint tall corn stalks or autumn leaves behind it. Keep facial details minimal so the project stays beginner-friendly. Using muted yellow, orange, brown, green, and red will help all the different harvest elements feel like one connected design.
16. Paint Corn Stalks Along the Window Sides
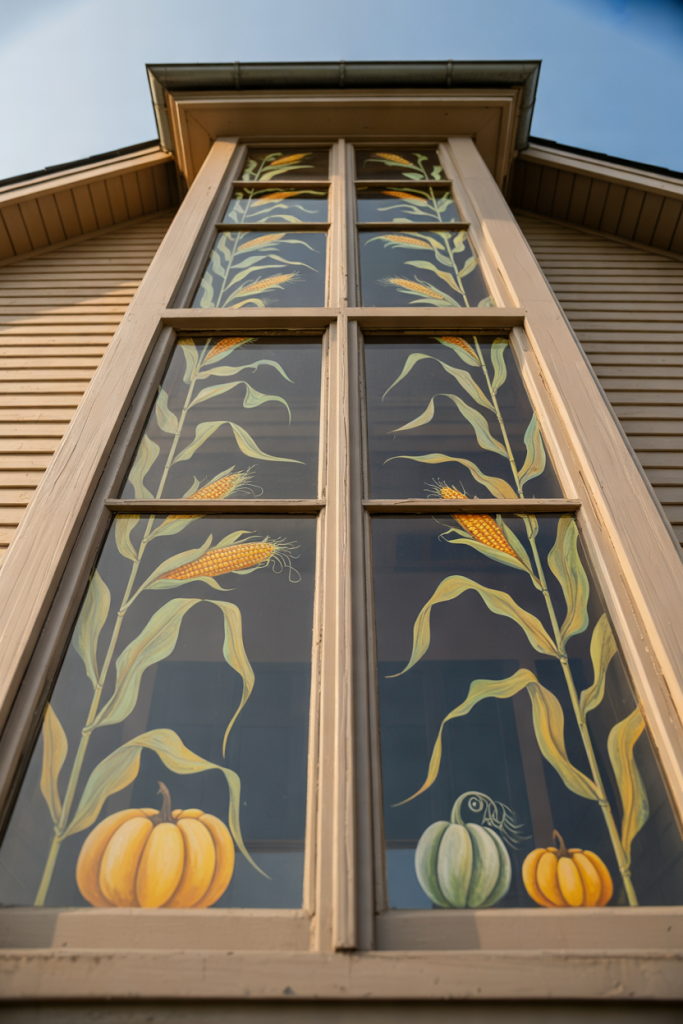
Tall windows work well for painted corn stalks because the design naturally follows the shape of the glass. Begin at one lower corner and paint several long golden-green stems reaching upward.
Add narrow leaves and a few simple ears of corn along the stalks. Place one or two small pumpkins, fallen leaves, or bundles of wheat near the base. You can repeat a smaller group on the opposite side if the window is wide. Keeping most of the artwork close to the edges creates a strong autumn frame while preserving the clear center.
17. Create an Autumn Stained-Glass Leaf Effect
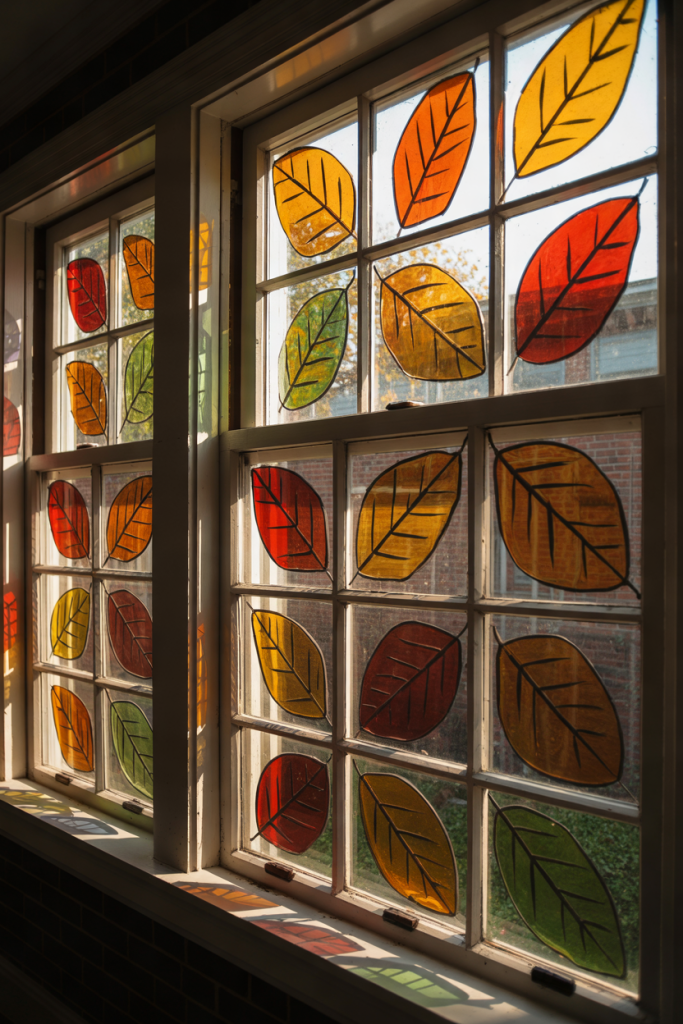
Use fall colors to create the appearance of stained glass without permanently changing the window. Start with several large leaf shapes that are easy to recognize.
Divide each leaf into smaller sections with dark outlines. Fill those sections with transparent-looking shades of red, orange, yellow, amber, and green using a washable product suitable for glass. You can create one large leaf or arrange several across part of the window. Daylight coming through the colored sections can make the design especially attractive during the day.
18. Paint Squirrels Gathering Acorns
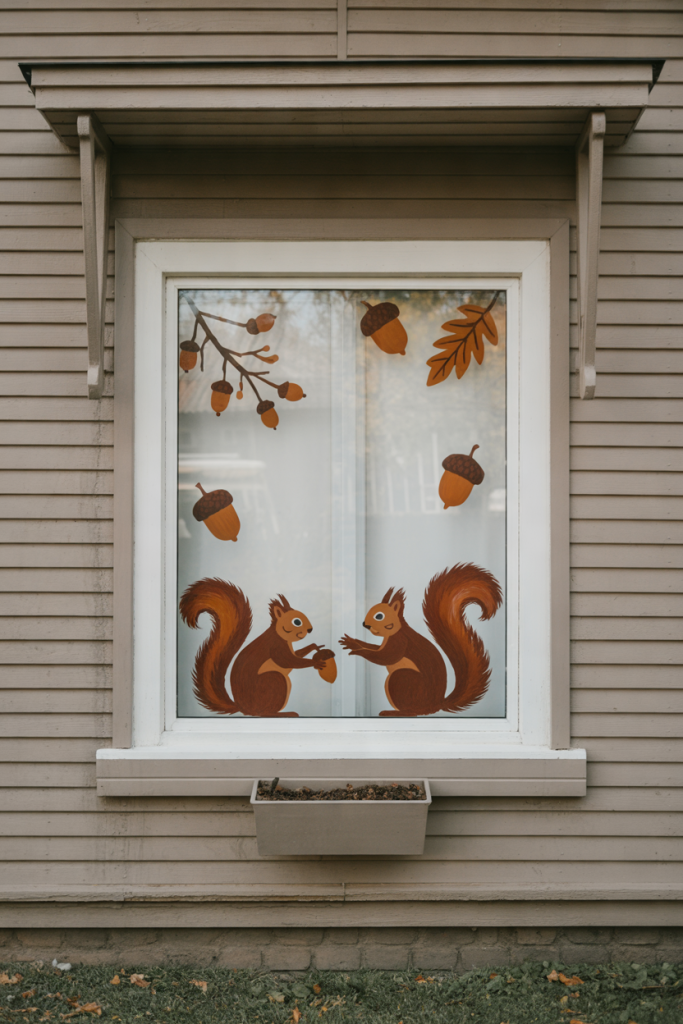
Create a playful woodland window with one or two squirrels gathering acorns. Keep the animals near the lower part of the glass so you have room for a few leaves above them.
Use simple silhouettes or basic brown shapes rather than detailed realistic animals. Paint several acorns around their feet and add a small branch with orange and yellow leaves nearby. One squirrel can hold an acorn while another sits beside a small pile. This design can work especially well on a family room or children’s playroom window.
19. Paint a Simple Autumn Botanical Border
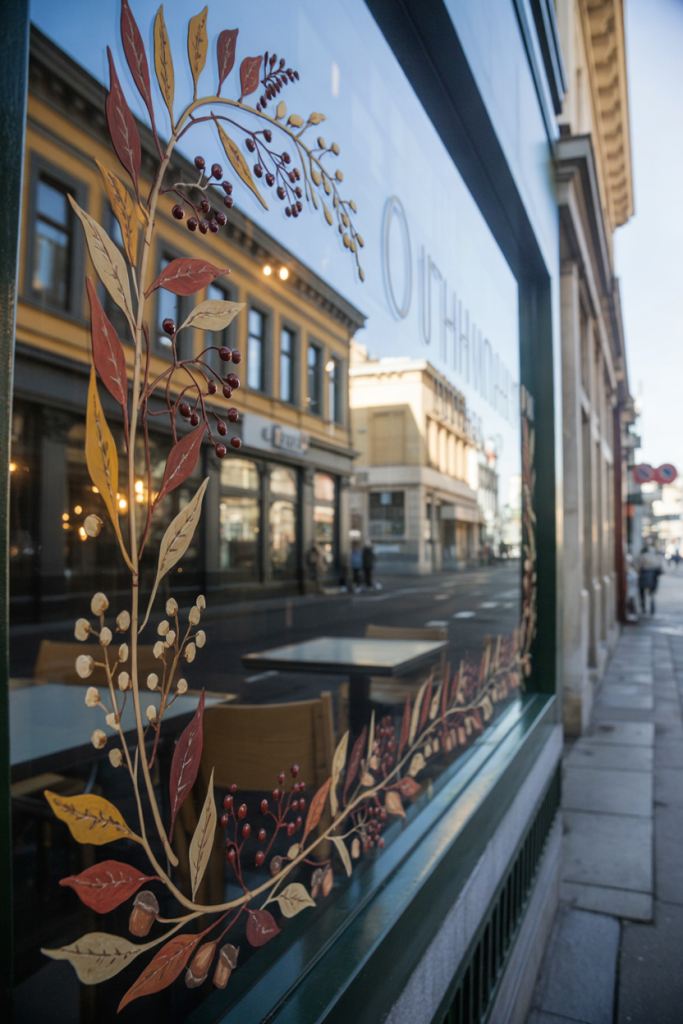
For a softer fall look, skip large pumpkins and characters and concentrate on autumn plants. Create a thin botanical arrangement around the sides and lower edge of the window.
Combine slender branches with leaves, berries, acorns, and small wheat stems. Use rust, ochre, burgundy, olive green, cream, and brown rather than lots of bright colors. Allow some branches to extend farther into the glass while others stay close to the edge. The result can feel seasonal without overwhelming the room or competing with other fall decorations nearby.
20. Create a Fall Books and Coffee Window Scene
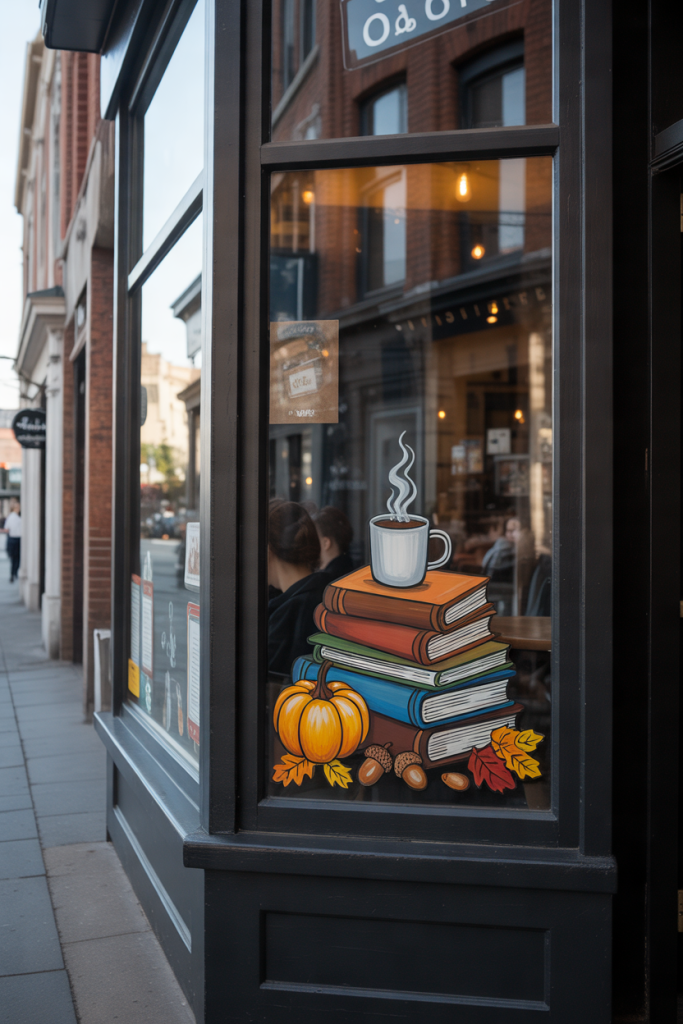
Finish with a cozy design inspired by a quiet autumn afternoon. Paint a small stack of books in one lower corner of the window and place a steaming mug on top or beside them.
Add a small pumpkin, a few acorns, and scattered fall leaves around the books. Simple curved white lines above the mug can suggest steam. Choose warm colors such as rust, mustard, brown, cream, and deep red. Keep the entire arrangement fairly compact so it looks like a little illustrated scene sitting on the window ledge rather than a mural covering the whole pane.
Conclusion
Fall window painting gives you a fun way to decorate with color without filling your tables, shelves, and floors with more seasonal items. You can keep things simple with a handful of falling leaves or create a larger harvest scene with pumpkins, sunflowers, woodland animals, and branches.
Start with a design that matches your painting skills and the size of your window. Keep enough glass clear for natural light, use removable materials when you want temporary seasonal art, and build the design from larger shapes before adding smaller details. Even a small painted corner can give an ordinary window a completely different look for autumn.
FAQs
What kind of paint should I use for fall window painting?
For temporary seasonal artwork, washable window paint or washable tempera is a practical choice. These are commonly used for removable window projects. Always follow the product directions and test a small hidden section of glass before painting a large design, because removal can vary between products and window surfaces. Jerrol’s
Should I paint the inside or outside of the window?
Painting on the inside can help protect temporary artwork from rain and outdoor weather. It is especially useful when the design is mainly intended to be viewed from outside. Remember that lettering can appear reversed depending on which side you paint, so test any words before completing the design. Education.com
How do I prepare a window before painting?
Clean the glass thoroughly and allow it to dry before you begin. You can plan the design on paper first and lightly sketch the main shapes using a suitable washable marker or similar removable guide. Protect the sill and floor below the window before you start painting. Jerrol’s
What are the easiest fall window paintings for beginners?
Pumpkins and scattered leaves are among the easiest options because they can be built from basic ovals, curves, and simple lines. Starting with only two or three colors can also make a beginner design easier to manage and keep it visually consistent. The Nestiora
How much of the window should I paint?
You do not need to cover the entire pane. Concentrating artwork along the bottom, corners, or edges leaves more glass clear for daylight and the outdoor view. It can also make the painted elements easier to see instead of turning the whole window into one busy scene. The Nestiora