Published On:
20 Halloween Window Painting Ideas for a Spooky and Fun Display
Share:


Halloween is the perfect time to turn your windows into something fun and spooky. You don’t need to be a professional artist to create beautiful Halloween window art. With a few paint colors and some creativity, you can turn ordinary glass into a festive display.
From friendly ghosts and smiling pumpkins to haunted houses and creepy skeletons, there are plenty of designs to try. Whether you’re decorating your home, front porch or shop, these 20 Halloween window painting ideas will help you celebrate the season.
1. Paint a Row of Jack-O’-Lanterns
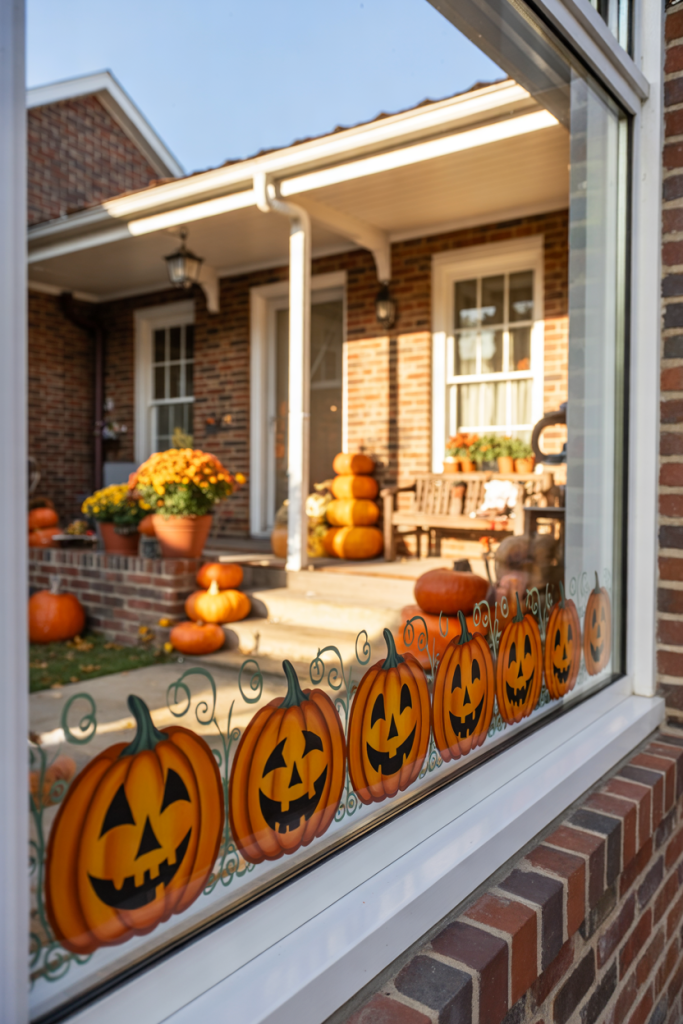
A row of colorful jack-o’-lanterns is a classic way to decorate your windows for Halloween. Paint several orange pumpkins along the bottom of the glass, making each one a different size and shape. Give them different expressions, such as happy smiles, surprised faces and spooky grins.
Use darker orange lines to add depth to the pumpkins and green or brown paint for their stems. You can also paint a few curling vines and small leaves between them. This design works especially well on wide windows because you can create a long pumpkin patch without covering the entire glass.
2. Create a Window Full of Floating Ghosts
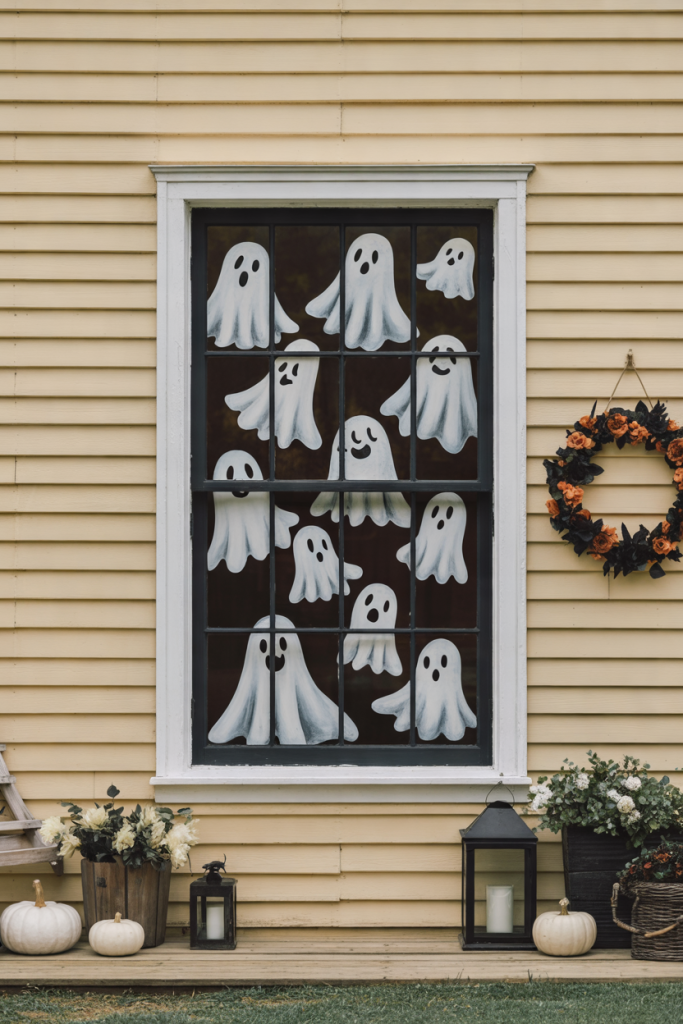
Turn your window into a playful Halloween display by painting white ghosts floating across the glass. Make some ghosts large and others small, placing them at different heights to create a sense of movement. Add simple black eyes and mouths to give each ghost its own personality.
You can paint a few ghosts waving their arms or tilting to one side for a more interesting look. Leave some clear space between the figures so the window doesn’t feel overcrowded. This is a great choice for beginners because the shapes are easy to draw and don’t require many colors.
3. Paint Flying Bats Across the Glass
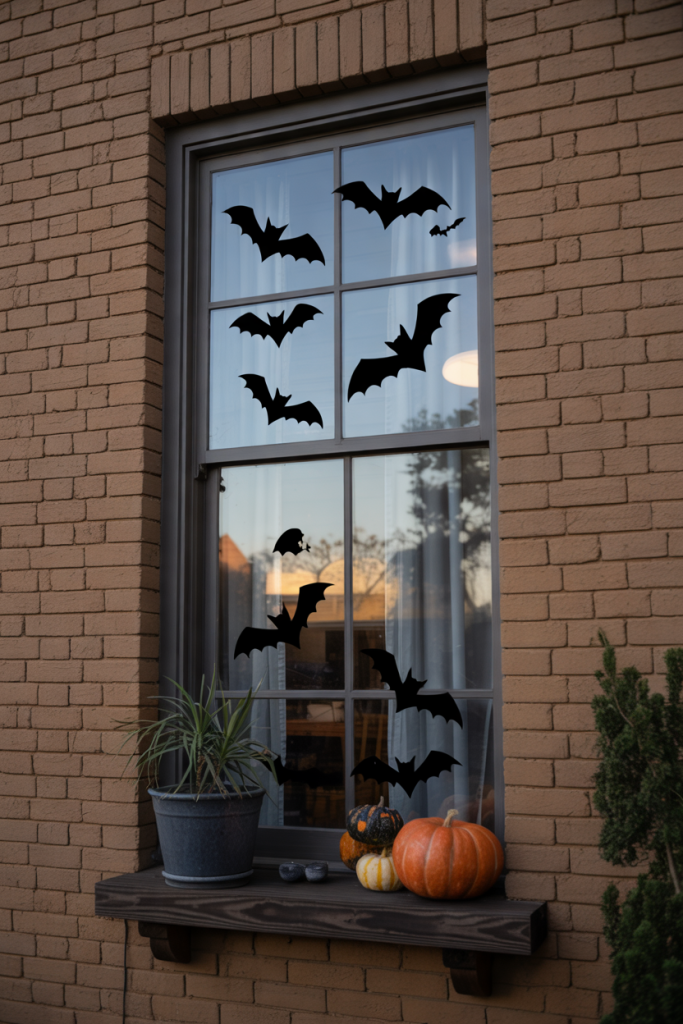
Flying bats are a simple way to give your windows a spooky Halloween look. Start by painting a few large black bats near one corner of the glass, then add smaller bats flying toward the opposite corner. Their different sizes will help create the appearance of a flock moving through the sky.
You can use a stencil to keep the bat shapes neat or paint them freehand for a more natural look. Try positioning some bats with their wings fully spread and others with their wings slightly folded. The dark silhouettes stand out beautifully against the daylight coming through the window.
4. Create Spider Webs in the Window Corners
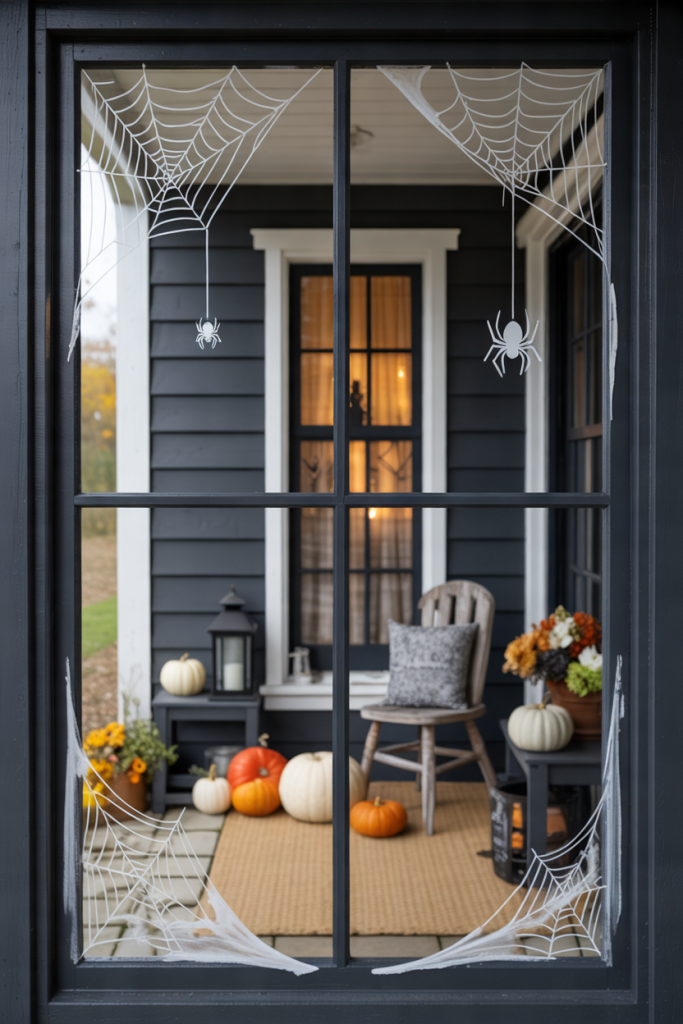
Spider webs can make an ordinary window look like part of a haunted house. Use white or light gray paint to create a large web in one upper corner of the glass. Add a smaller web in the opposite corner to make the arrangement feel balanced.
Paint a few black spiders crawling along the webs, with one hanging from a thin thread. You can make the spiders look cute with round bodies or give them longer legs for a creepier appearance. This design works particularly well on windows with dark frames and can be combined with other Halloween artwork.
5. Paint a Haunted House Under a Full Moon
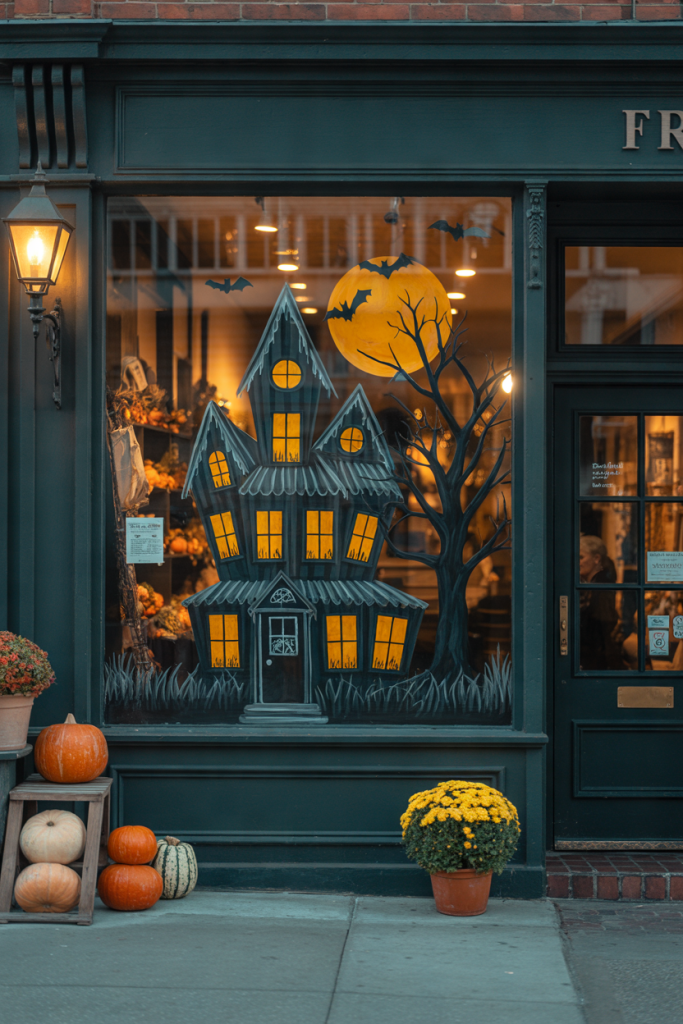
Create a spooky nighttime scene by painting a crooked haunted house in the lower part of your window. Give the house pointed roofs, uneven windows and a tall chimney. Use black or dark gray paint for the building and yellow for the windows to make them look as though lights are glowing inside.
Paint a large orange or pale yellow moon above the house, then add a few flying bats and a bare tree. Keep the background mostly clear so the different shapes remain easy to see. This design is especially attractive on large windows where there is enough space for a complete scene.
6. Paint a Witch Flying Across the Moon
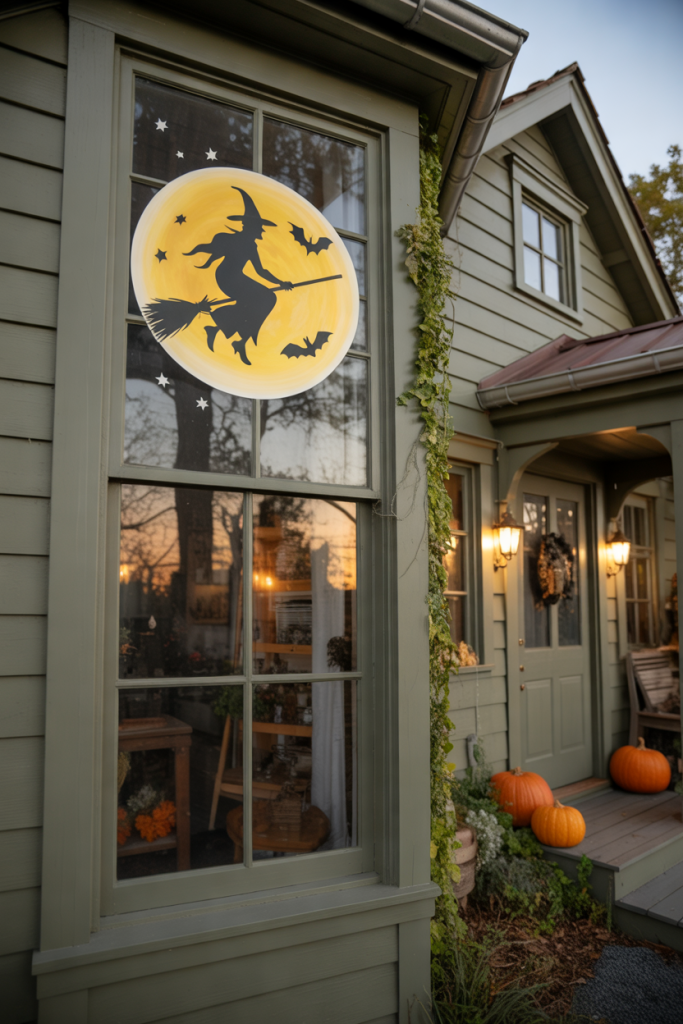
A witch flying across the moon is one of the most recognizable Halloween scenes. Paint a large yellow or orange moon in the upper half of the window. Once it has dried, add a black silhouette of a witch riding her broomstick across it.
Give the witch a pointed hat, a flowing cape and a slightly curved broom to make the shape easy to recognize. You can also paint a few small bats or stars around the moon. This design looks especially attractive on a window that faces the street, where the large silhouette can be seen from a distance.
7. Create a Black Cat and Crescent Moon Scene

Black cats are a popular Halloween symbol and make a lovely subject for window painting. Paint one or two cats sitting along the bottom of the glass. Give them pointed ears, long curved tails and bright yellow or green eyes to make their features stand out.
Above the cats, paint a large crescent moon with a few small stars around it. You can also add a couple of tiny bats to fill any empty spaces. Use mostly black, yellow and purple to keep the colors consistent. This design is a good choice if you want something mysterious without making your window too frightening.
8. Paint a Colorful Candy Corn Border
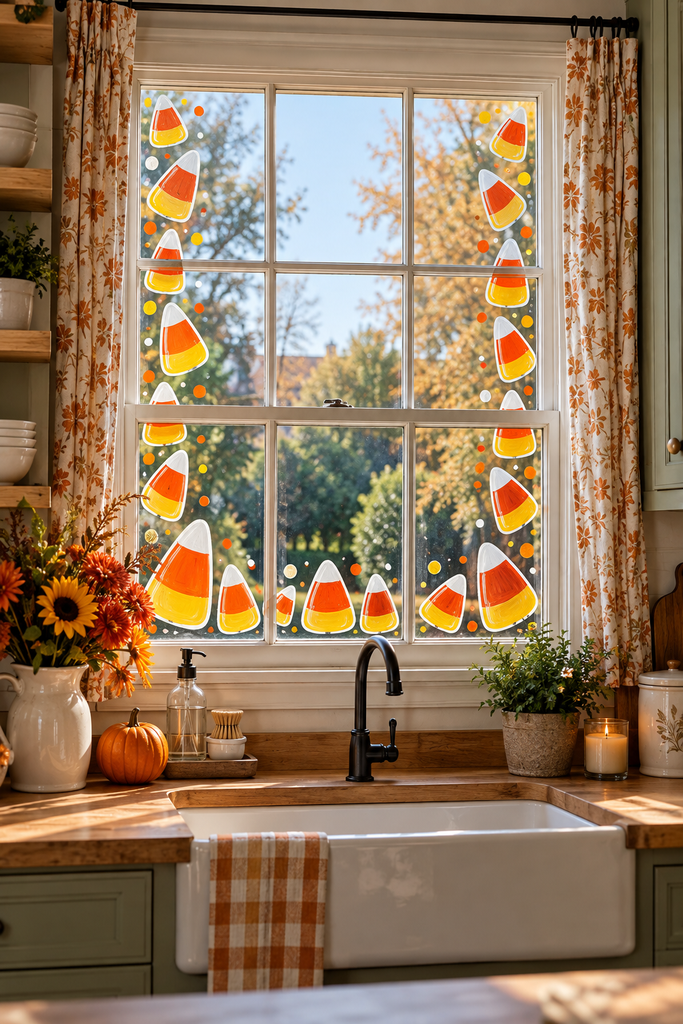
Candy corn is a fun Halloween design that works particularly well for beginners. Paint small triangular candy pieces along the bottom and sides of your window. Give each piece the familiar yellow base, orange middle and white tip. Make some pieces slightly larger or tilted to keep the pattern interesting.
You can arrange the candy in neat rows or scatter it around the glass for a more playful appearance. Leave the center of the window clear so natural light can still enter the room. This colorful border is ideal for kitchen windows, children’s rooms and storefronts that need a cheerful Halloween display.
9. Create a Spooky Graveyard Silhouette
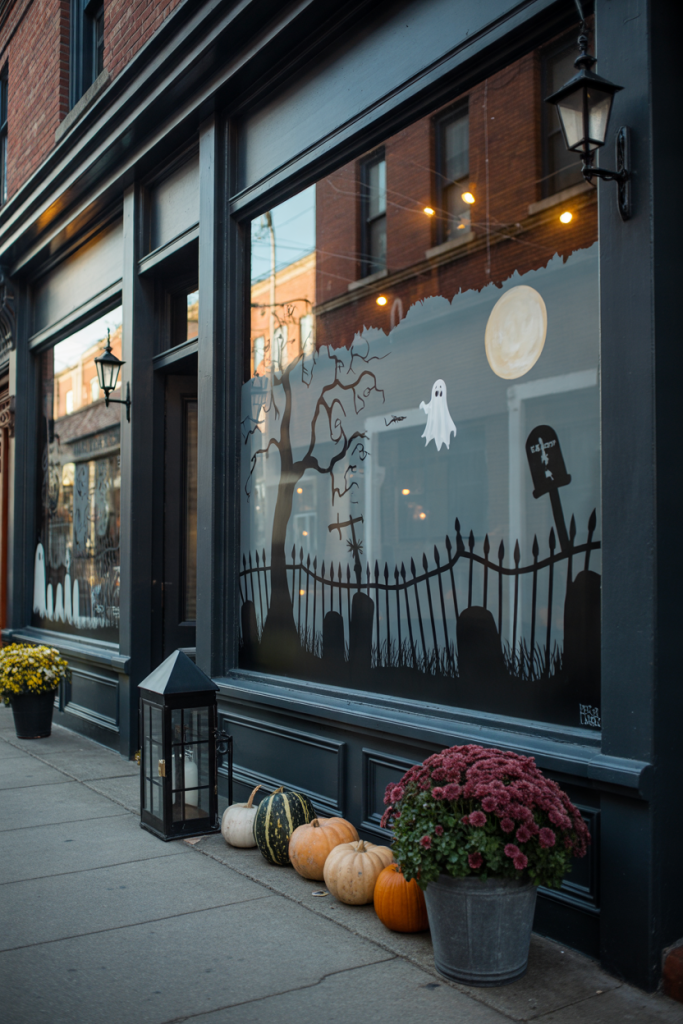
A spooky graveyard scene can turn a large window into a miniature Halloween landscape. Paint a row of black and gray gravestones along the bottom of the glass, giving them different heights and shapes. Add a few crosses, crooked fences and patches of grass to make the scene more detailed.
Paint a bare tree on one side, with its twisted branches reaching toward a pale yellow moon. You can also add a small ghost floating between the gravestones. Keep most of the design in the lower half of the window so the scene doesn’t become too crowded. It is a great choice for traditional spooky Halloween decorating.
10. Paint Cute Ghosts With Colorful Bows
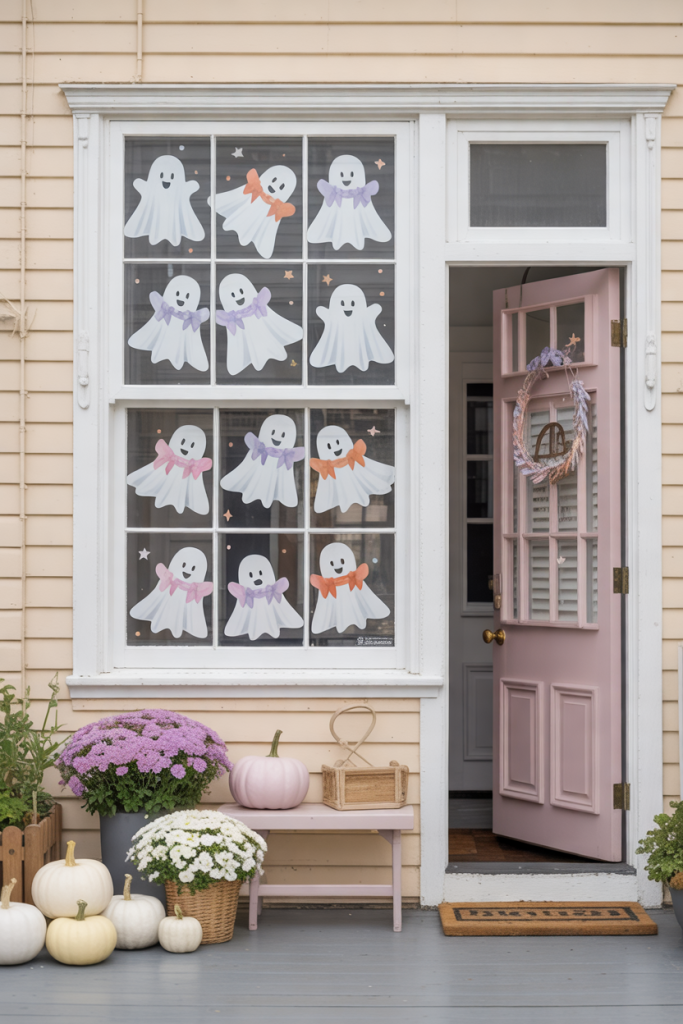
If you prefer cute Halloween decorations, try painting a group of little ghosts wearing colorful bows. Start with simple white ghost shapes, then add black eyes and small smiling mouths. Paint a pink, purple or orange bow on each ghost to give the design a playful look.
Arrange the ghosts at different heights, as though they are floating around the window. You can also add a few small stars between them. Keep the background clear so the white figures stand out. This idea works particularly well for bedrooms, playrooms and homes where you want Halloween decorations that feel cheerful rather than scary.
11. Paint a Witch’s Bubbling Cauldron
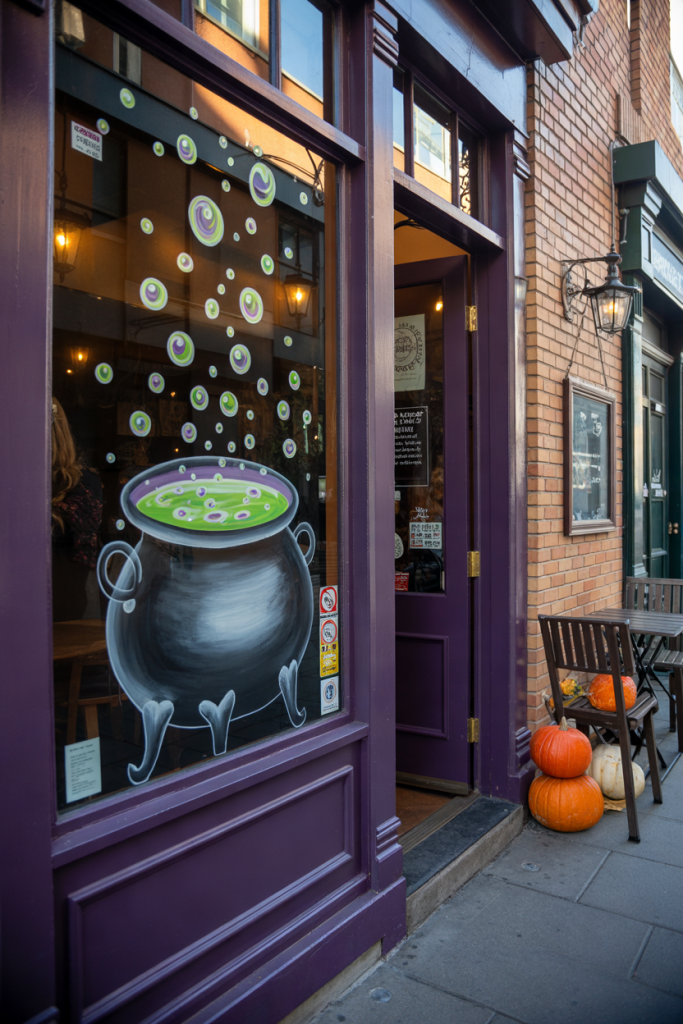
A bubbling witch’s cauldron is a colorful way to decorate a window for Halloween. Paint a large black cauldron in the lower center of the glass, giving it a wide opening and two small handles. Fill the top with bright green or purple potion and add bubbles rising above it.
Use different sizes of circles to make the bubbles look as though they are floating upward. You can also paint a few stars, magical swirls or a small witch’s hat nearby. This design works best when the cauldron is large enough to be the main feature, while the colorful potion adds contrast against the dark paint.
12. Create a Dancing Skeleton Window Scene
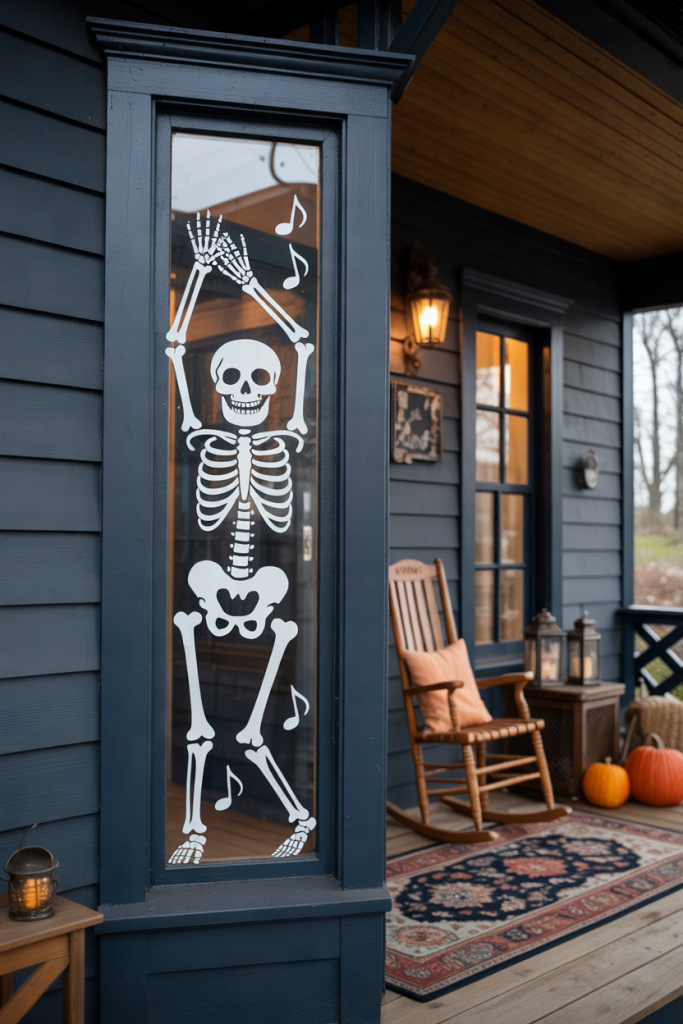
A dancing skeleton can make your Halloween window look spooky and funny at the same time. Paint a white skull near the middle of the glass, then add a simple rib cage, arms and legs. Position the bones so the skeleton looks as though it is dancing or striking a silly pose.
Give the skull large black eye sockets and a wide smile to keep the design playful. You can also paint small musical notes around it or add a second skeleton in a different pose. This idea is particularly effective on tall windows, where there is enough room to show the entire figure without squeezing the design.
13. Paint a Spooky Tree With Twisted Branches
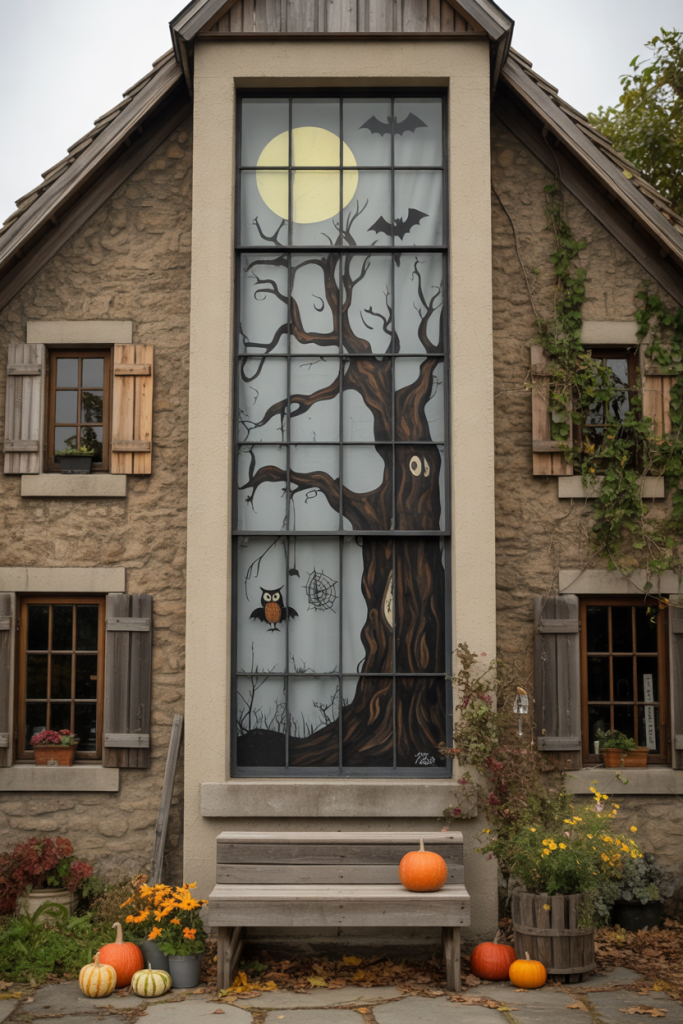
A spooky tree is an excellent choice if you want Halloween artwork that covers a large section of your window. Paint a thick black or dark brown trunk rising from one lower corner. Extend long, twisted branches across the glass, making some thinner than others for a more natural appearance.
Add a few small bats hanging from the branches or paint an owl sitting near the top. You can also include a pale moon behind the tree to create a nighttime effect. This design looks particularly striking on a tall window, where the branches can stretch upward while leaving some of the glass uncovered.
14. Paint a BOO Design With Ghosts and Bats
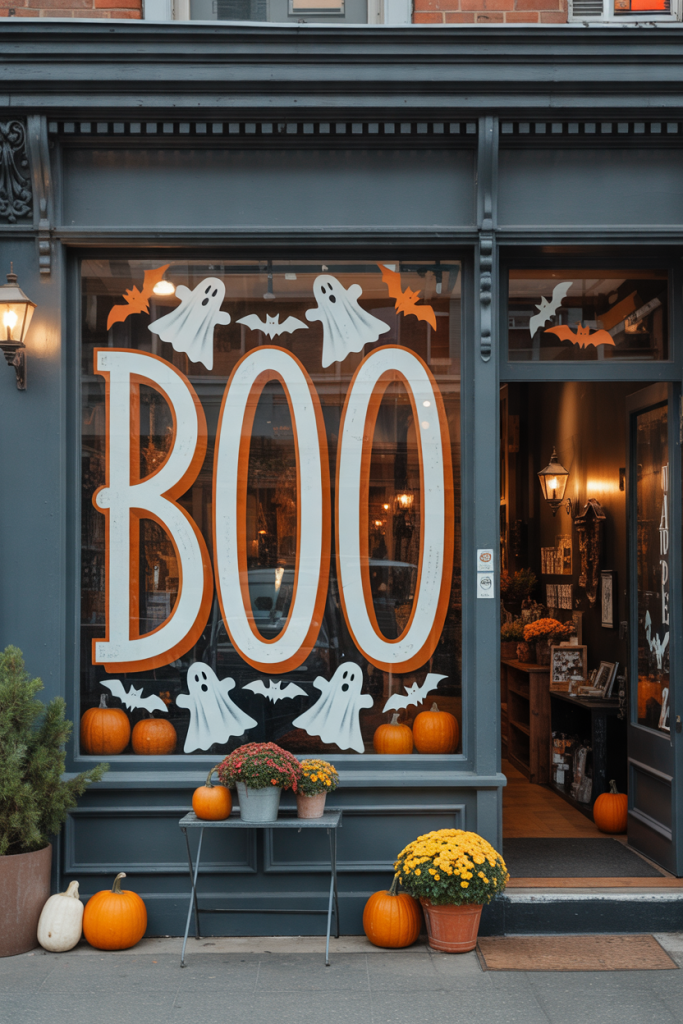
Large BOO lettering is a fun way to turn your window into a Halloween greeting. Paint the word in the center of the glass using bold white, orange or purple letters. Make the letters large enough to be seen from outside, especially if your window faces the street.
Surround the word with a few small ghosts, black bats and orange pumpkins. You can also turn the two O’s into ghost faces by adding little eyes and mouths. Keep the smaller illustrations spaced out so the lettering remains the main feature. This idea works well for both residential windows and shop displays.
15. Create a Purple Halloween Night Sky
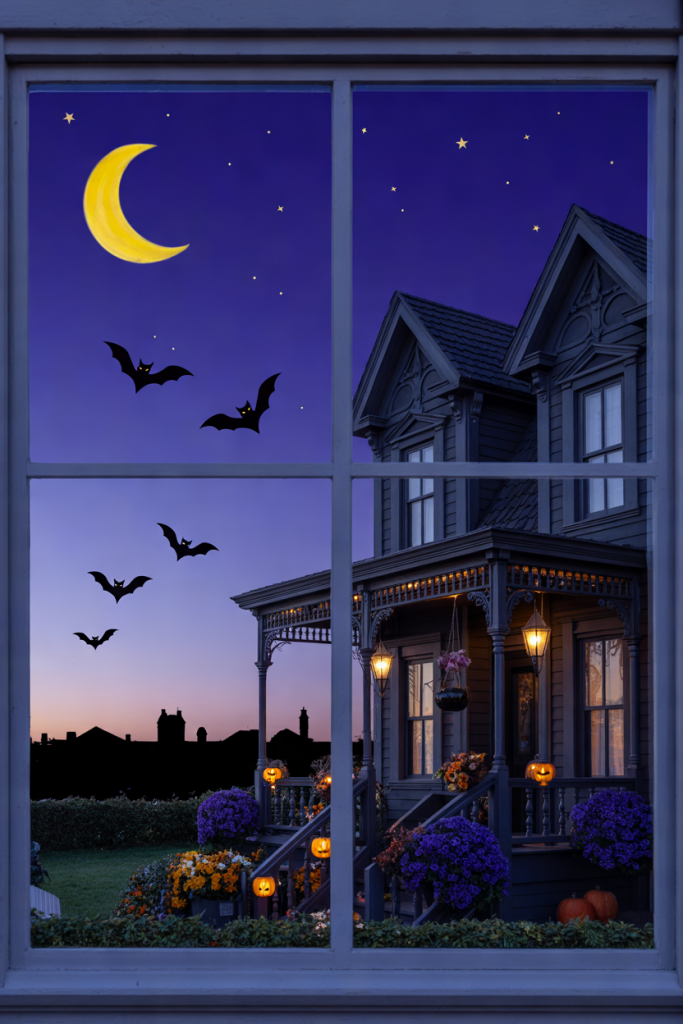
A purple Halloween night sky is a colorful alternative to the usual orange-and-black decorations. Paint a deep purple background across the upper part of the window, leaving some areas lighter to create a soft evening effect. Add a bright yellow crescent moon and several small white or yellow stars.
Paint black bats flying across the sky at different heights. You can also add the silhouette of a small rooftop or a crooked tree along the bottom. This design is especially attractive when viewed from outside in the evening. Use bold shapes and contrasting colors to make the artwork easy to recognize from a distance.
16. Paint a Border of Witch Hats
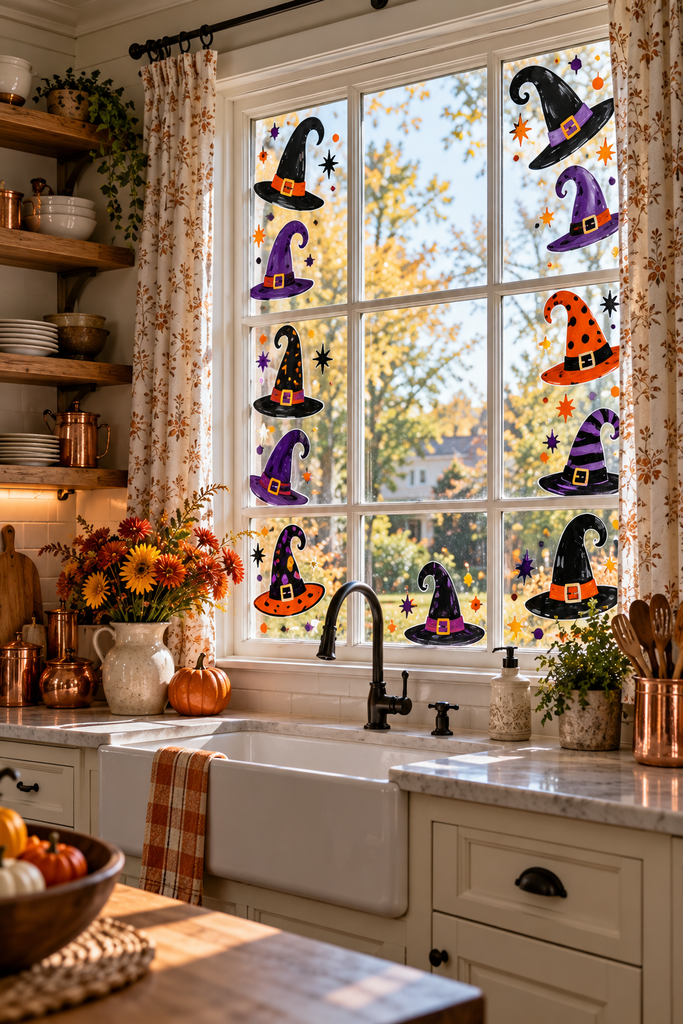
A border of colorful witch hats is a simple Halloween painting idea that doesn’t require much drawing experience. Paint pointed hats around the edges of the window, using black, purple and orange as the main colors. Give each hat a wide brim and a contrasting band with a small buckle.
Tilt some hats to the left and others to the right to make the pattern look more natural. You can also add a few small stars between them. Keep the center of the glass clear so the design doesn’t block too much daylight. This is a practical option for smaller windows and people who prefer simple seasonal artwork.
17. Create a Friendly Frankenstein Monster Face
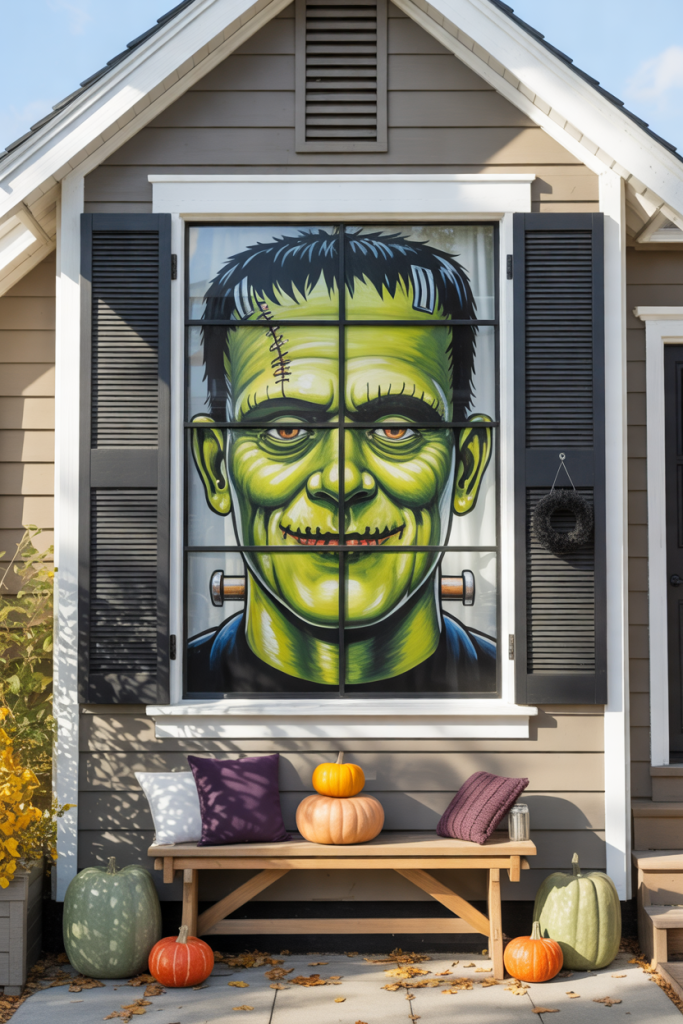
A friendly Frankenstein-inspired monster face is a great way to add a playful character to your Halloween window. Paint a large green face with a square forehead, short black hair and two small bolts near the neck. Give the monster round eyes, a simple nose and a crooked smile.
Add a few small black stitches on the forehead or cheeks to make the character more recognizable. Use thick outlines so the face stands out against the glass. You can paint the monster in the center of a small window or place it in one corner of a larger display. The simple shapes make it suitable for beginners.
18. Paint a Haunted Halloween Village
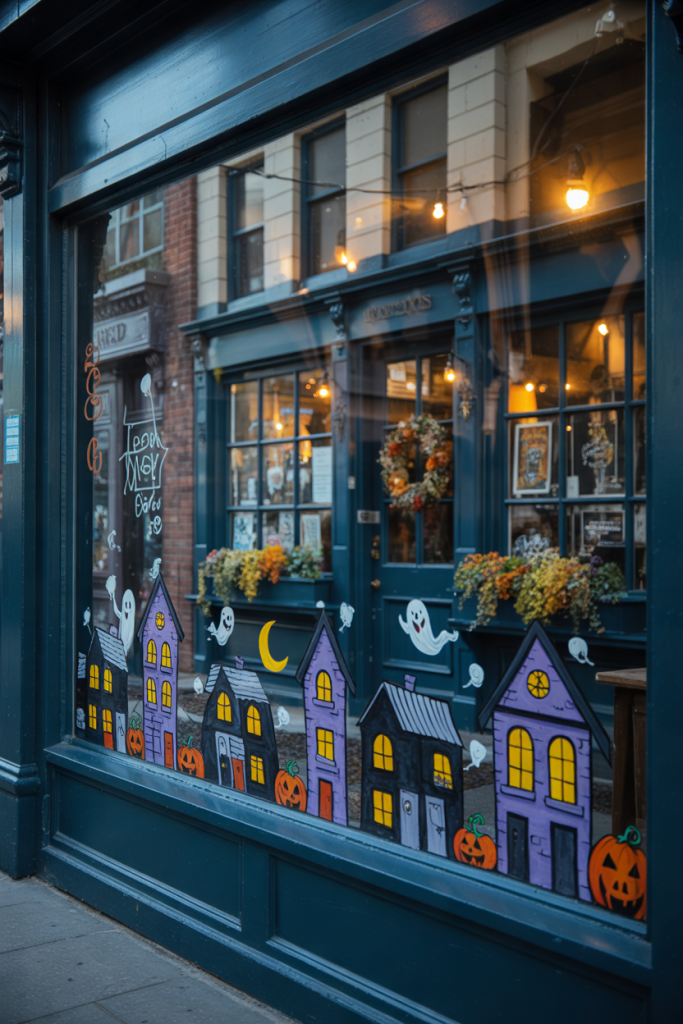
Create a miniature Halloween village by painting a row of crooked houses across the bottom of your window. Give each house a different shape, with pointed roofs, tall chimneys and uneven windows. Use black, dark purple and gray for the buildings, then add yellow or orange windows to make them appear illuminated.
Paint a winding path between the houses and place a few small pumpkins near the doors. You can also add floating ghosts and a moon above the rooftops. This design works particularly well on wide windows because you have enough space to create several buildings without making the scene feel overcrowded.
19. Paint Skeleton Hands Gripping the Window
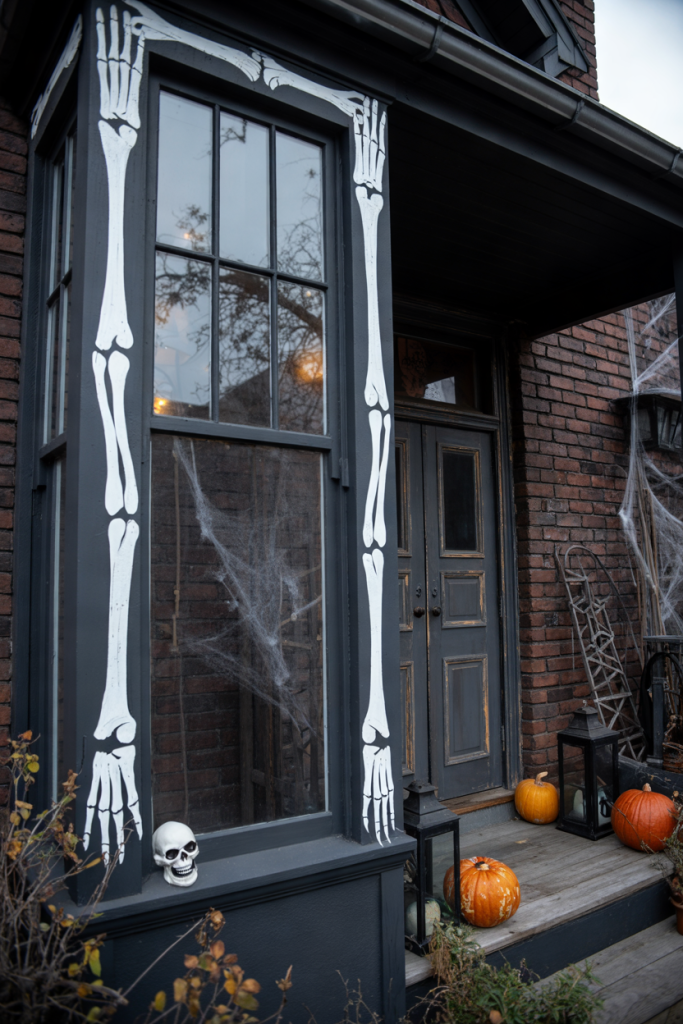
For a creepier Halloween display, paint white skeleton hands reaching inward from the edges of your window. Give each hand long, thin fingers and clearly separated bones. Position the fingers so they look as though they are gripping the sides of the glass.
You can paint one large hand near the top and another near the bottom to create an uneven arrangement. Add a small skull peeking out from one corner if you want a more dramatic effect. A dark background or nighttime lighting will make the white bones stand out. This idea is especially suitable for Halloween parties and haunted-house decorations.
20. Create a Halloween Window With Pumpkins, Ghosts and Bats
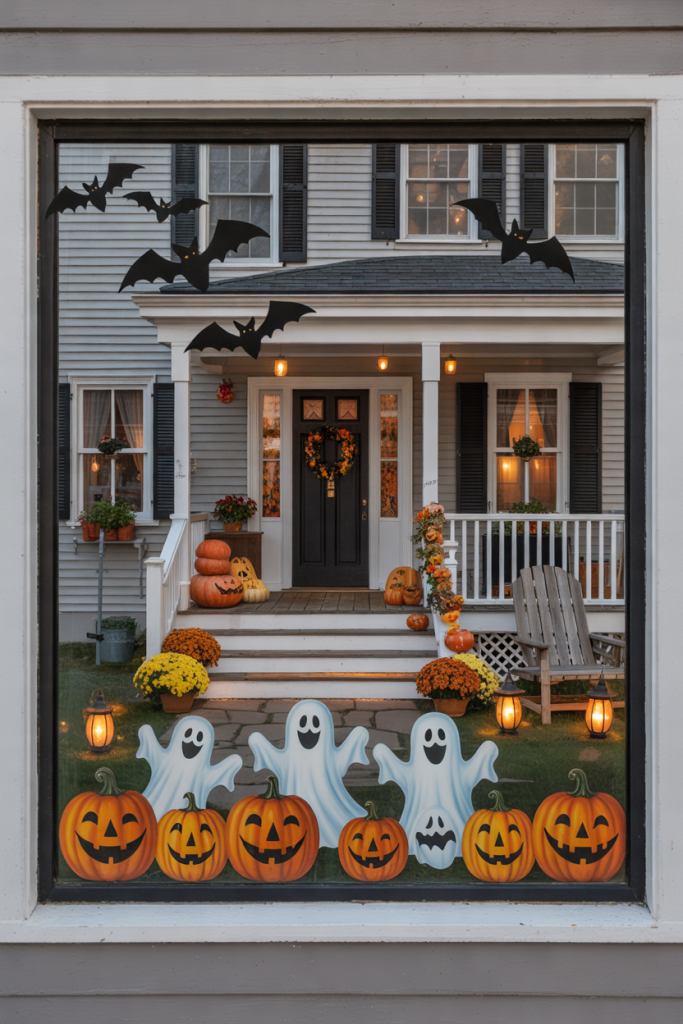
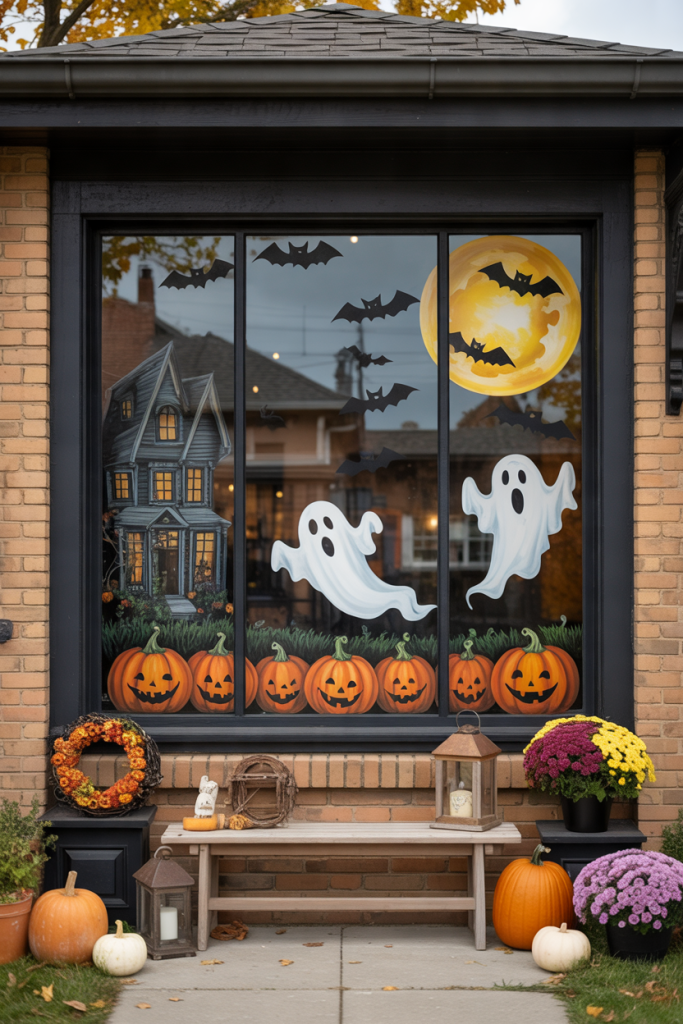
If you can’t decide on just one Halloween design, combine three classic symbols in a single window painting. Start by painting a row of orange pumpkins along the bottom of the glass. Give them different sizes and facial expressions to make the display more interesting.
Next, paint several white ghosts floating through the middle of the window. Finish with a group of black bats flying across the upper corners. Keep the three groups separated so each part of the design remains easy to see. This arrangement creates a complete Halloween display without requiring complicated painting techniques or too many colors.
Conclusion
Halloween window painting is a fun way to decorate your home without buying lots of seasonal decorations. Whether you choose smiling pumpkins, floating ghosts, spooky trees or an entire haunted village, you can create a display that matches your Halloween style.
Start with a simple design if you’re new to painting, or combine several ideas for a larger scene. With the right washable paint and a little creativity, your windows can become one of the most eye-catching parts of your Halloween decorations.
FAQs
What kind of paint should I use for Halloween window painting?
Washable window paint designed for glass is a good choice for temporary Halloween decorations. Washable tempera paint is also used for window art, but you should check the product instructions and test it on a small area before painting the entire window. Avoid permanent glass paint if you plan to remove the artwork after Halloween.
How do you paint Halloween designs on windows?
Start by cleaning and drying the glass. Sketch your design on paper or use a stencil to help you create the shapes. Paint the larger areas first and let them dry before adding smaller details, such as eyes, outlines and patterns. Protect the windowsill and floor with old newspapers or a cloth to catch any paint drips.
What are the easiest Halloween window painting ideas for beginners?
Ghosts, pumpkins, bats and candy corn are some of the easiest designs to try. They use simple shapes and require only a few colors. You can also use stencils to make the outlines easier to paint. Start with one small design before attempting a larger scene that covers the entire window.
Can I paint on the inside of my windows?
Yes, provided the paint is suitable for the glass and its finish. Painting on the inside can help protect temporary artwork from rain and wind. If the design includes words, check how they will appear from outside before painting them. Always follow the paint manufacturer’s instructions, particularly for tinted or coated windows.
How do I remove Halloween window paint?
The removal method depends on the paint you use. Many washable paints can be softened and removed with water and a soft cloth. Some tempera paints may require warm, soapy water. Follow the manufacturer’s cleaning instructions and avoid abrasive tools that could damage the glass or its coating.