Published On:
14 Kids Craft Storage Ideas That Are Easy and Budget-Friendly
Share:


Kids love making things, but crayons, paper, markers, glue, paint, and tiny craft pieces can quickly take over a room. The good news is that you do not need a large craft room or expensive storage furniture to keep everything under control.
The best kids craft storage ideas are simple enough for children to use on their own. Supplies they use every day should be easy to see and reach, while messy, sharp, or less-used materials can be stored separately.
You can also reuse many things you already have at home. Old jars, magazine holders, shoe organizers, small baskets, food containers, and cleaning caddies can all become useful art supply storage.
Here are 14 practical ideas that can work in bedrooms, playrooms, closets, kitchens, or even a small corner of the living room.
1. Hang a Pegboard Above the Craft Table
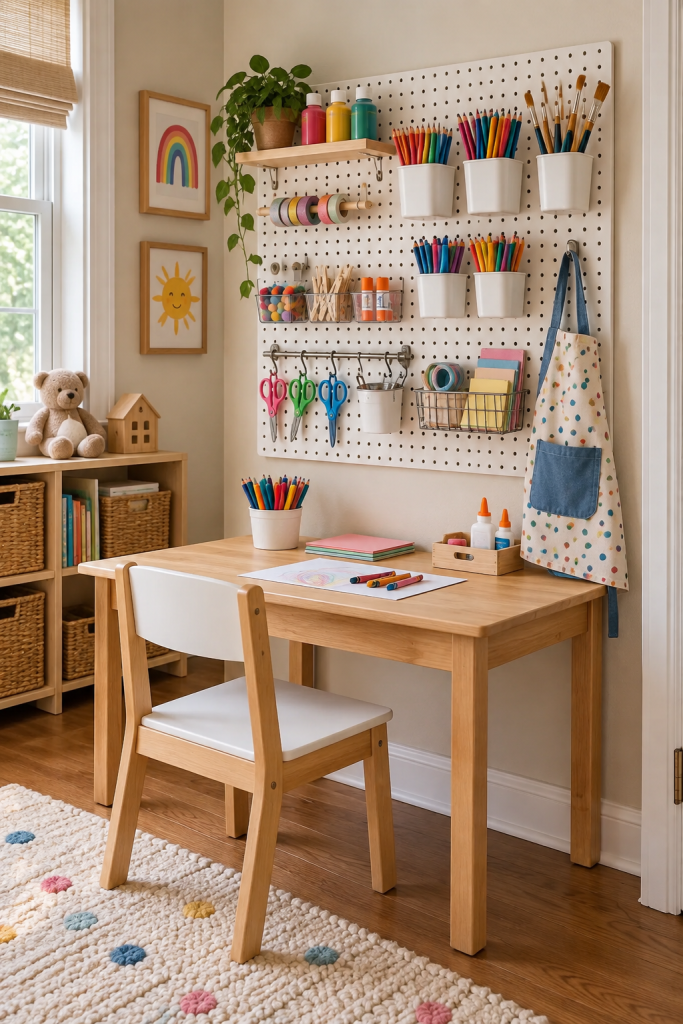
A pegboard is a smart choice when you have a small craft table but plenty of empty wall space. Instead of filling the tabletop with containers, hang frequently used supplies directly above it.
Add small pegboard cups or baskets for markers, colored pencils, glue sticks, tape, and paintbrushes. Hooks can hold child-safe scissors, rulers, aprons, or small rolls of ribbon.
Keep the things your child uses most at an easy-to-reach height. Supplies that need adult supervision can go higher up.
The best part is that the layout can change as your child’s craft collection changes. You can move hooks and containers without replacing the whole storage system.
2. Turn a Shoe Organizer Into Door Storage
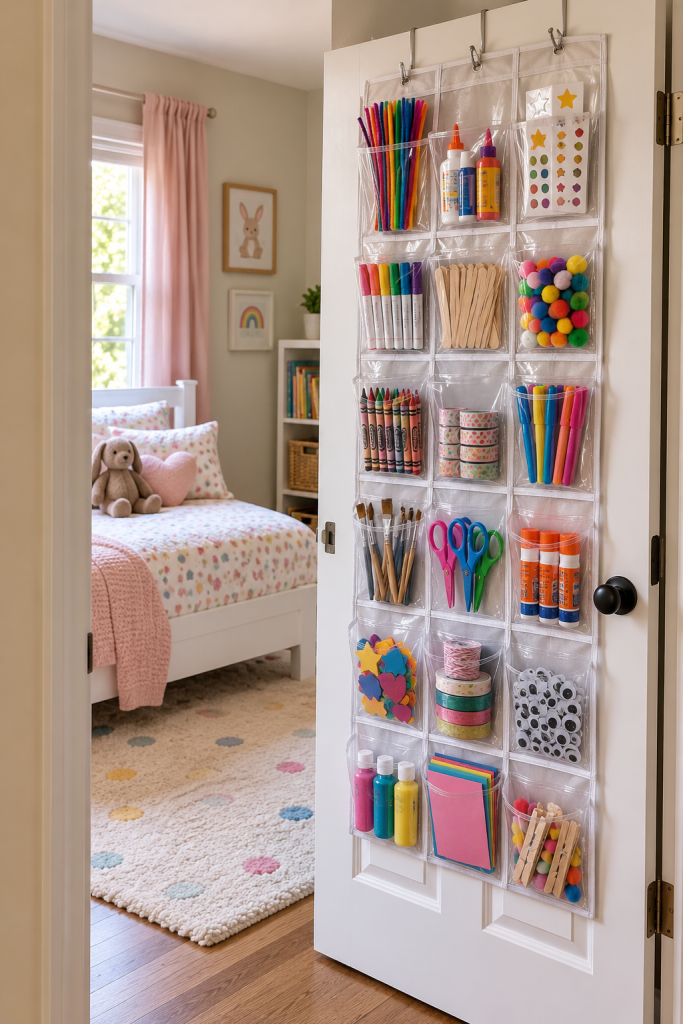
An over-the-door shoe organizer can hold much more than shoes. Its individual pockets are useful for separating small art and craft supplies without taking up shelf or floor space.
Use different pockets for markers, crayons, glue sticks, stickers, ribbon, craft sticks, stamps, and paintbrushes. Clear pockets are especially useful because children can see what is inside.
Hang the organizer behind a bedroom, playroom, or closet door. Put everyday, child-safe supplies in the lower pockets and items that require supervision higher up.
This is especially useful for small craft spaces because the organizer uses an area that would normally stay empty.
3. Use Stackable Drawers for Different Craft Categories
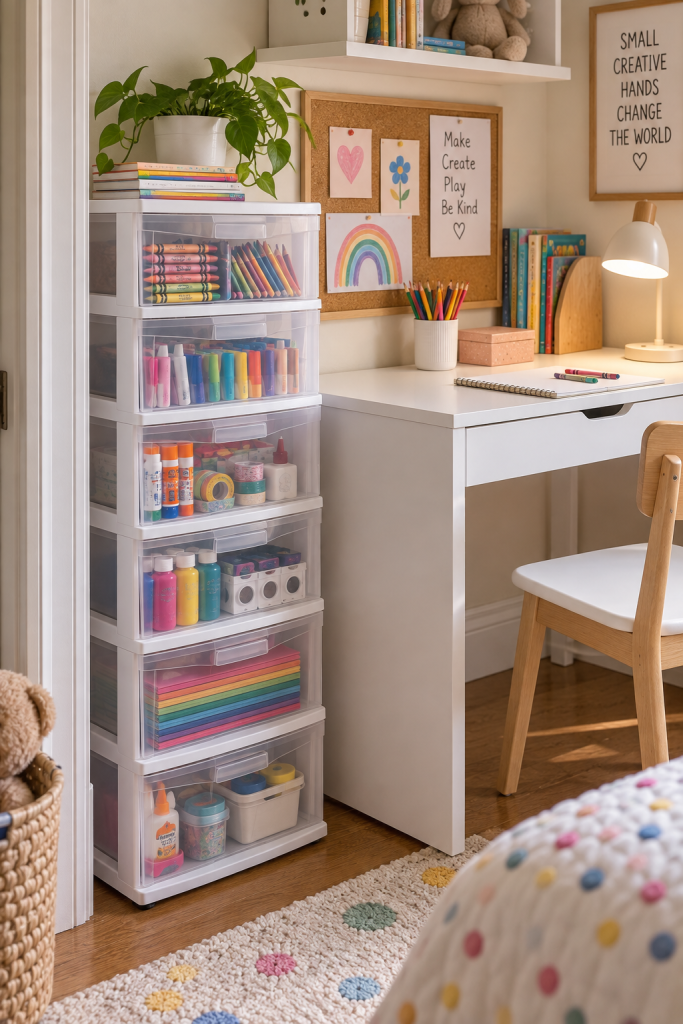
If your child’s supplies are constantly getting mixed together, a small stack of drawers can give every category its own home.
Use one drawer for crayons and colored pencils, another for markers, another for glue and tape, and a deeper drawer for paint, modeling materials, or larger tools. Paper can have a separate wide drawer if the unit is large enough.
Add simple labels to the front so children know where everything belongs. For younger kids, combine the written label with a small picture.
Stackable drawers work particularly well under a desk, inside a closet, or beside a craft table because they use vertical space instead of spreading supplies across the room.
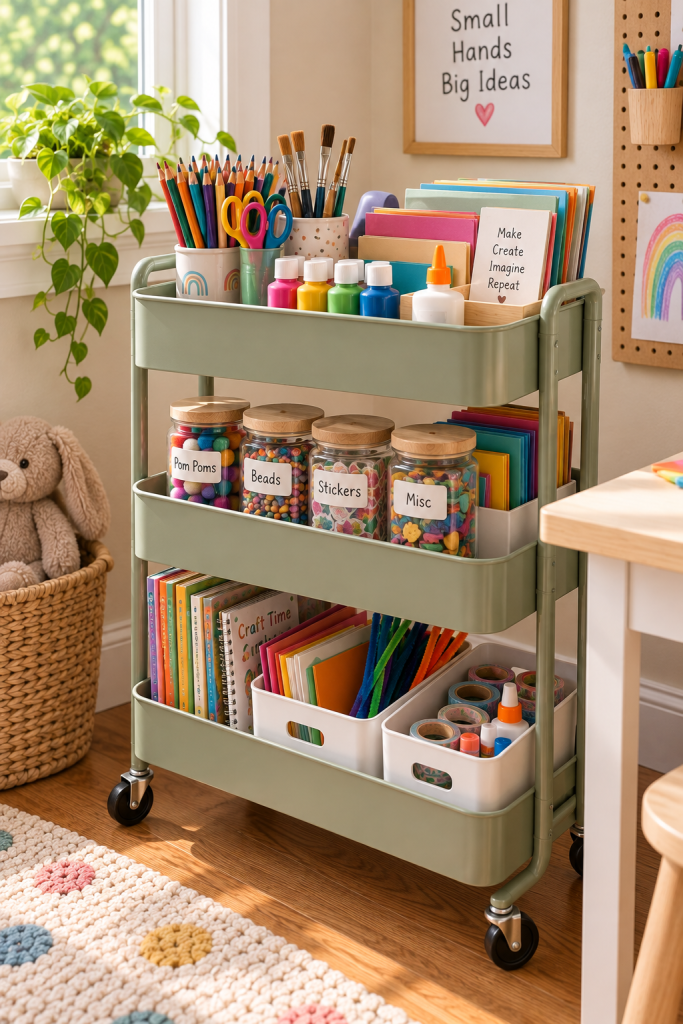
4. Make a Rolling Cart Into a Mobile Art Station
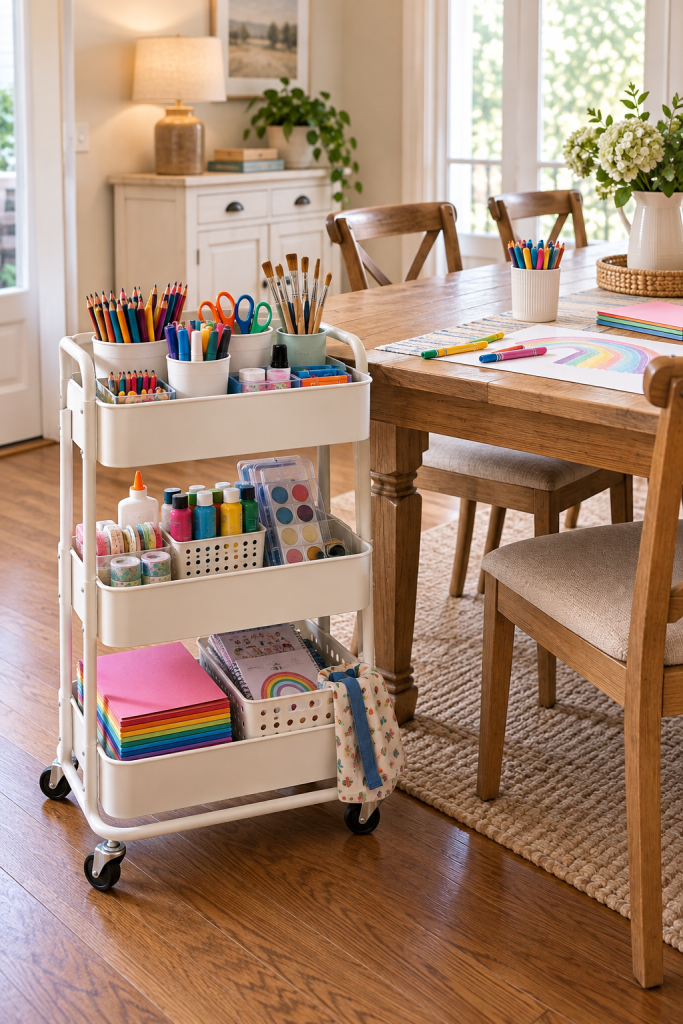
A rolling cart works well when children make crafts in different parts of the house. Instead of carrying armfuls of supplies to the kitchen table and back, keep the basics together on one movable cart.
Give each level a job. The top tier can hold crayons, markers, pencils, and scissors. Keep glue, tape, and paint supplies in the middle. Use the bottom for construction paper, coloring books, aprons, or larger materials.
Small containers inside each tier stop everything from becoming one big pile.
When craft time is finished, roll the entire station back into a bedroom, playroom, pantry, or closet.
This solution is especially practical when you don’t have space for a permanent kids’ craft table.
5. Store Pencils and Brushes in Reused Jars
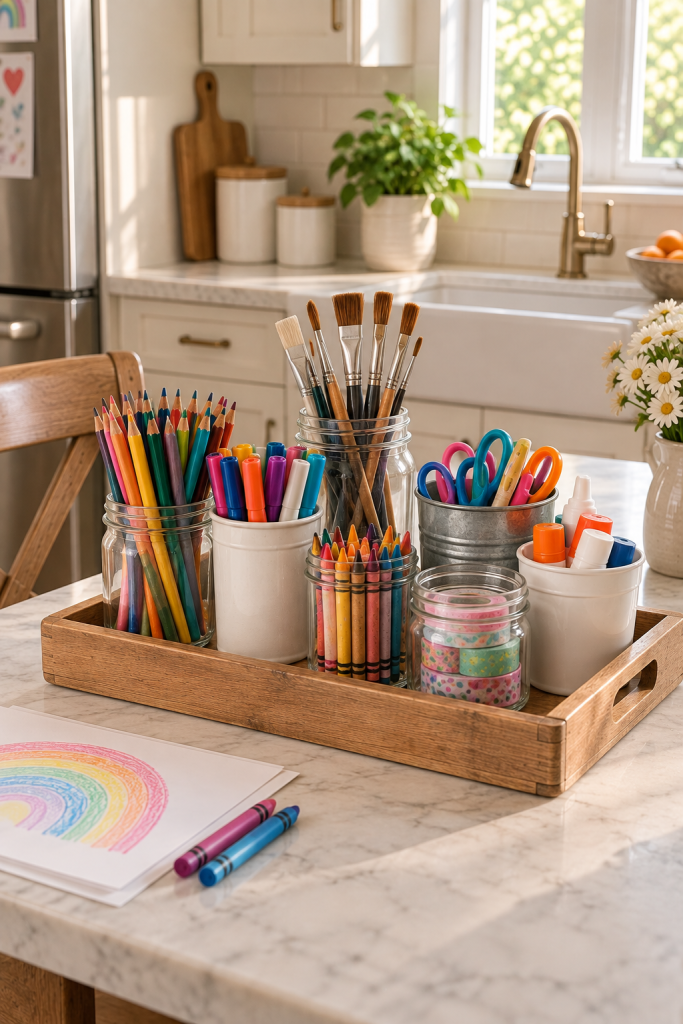
You do not need to buy matching organizers for every small craft supply. Clean jars, tins, and sturdy food containers can make excellent holders for pencils, crayons, markers, and paintbrushes.
Sort supplies by type rather than putting everything into one large container. For example, use one jar for colored pencils, one for markers, and another for brushes. This makes it much easier for children to grab what they need.
Place several containers together on a tray so you can move the whole group when it is time to clean the table.
For younger children, choose lightweight, non-breakable containers instead of glass jars.
Budget tip: Save suitable food containers for a few weeks and create this setup for almost nothing.
6. Keep Craft Paper Upright in Magazine Holders
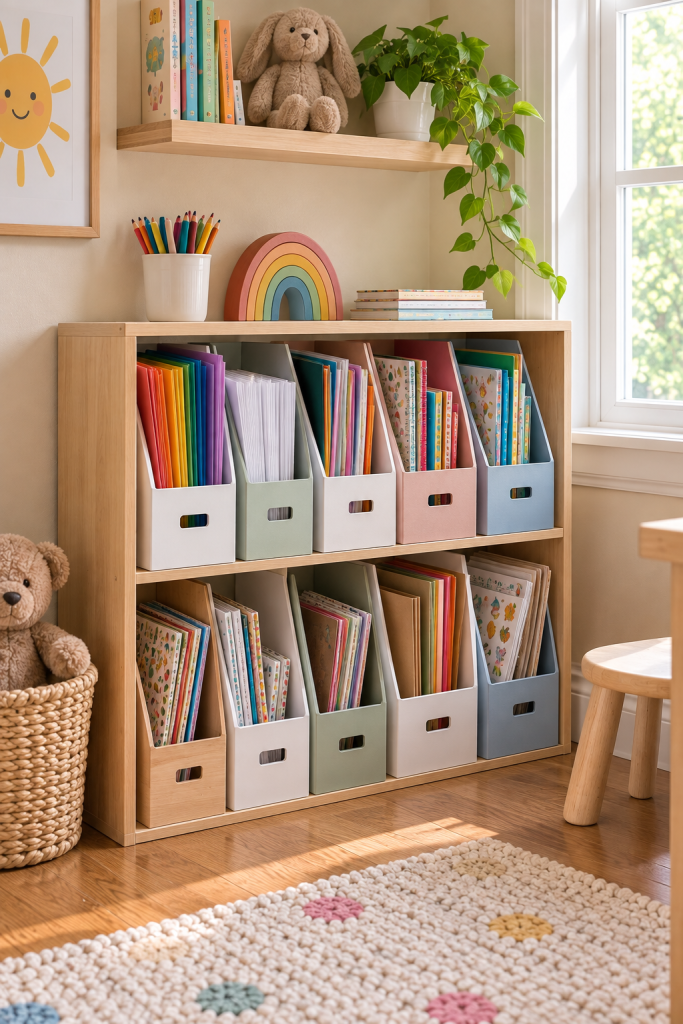
Construction paper, coloring books, drawing pads, and activity books can become messy when they are stacked in one large pile.
Magazine holders provide a simple way to store them vertically. Use separate holders for colored paper, white drawing paper, coloring books, sticker books, and finished projects that children want to keep.
Place the holders on a low shelf where children can pull out the category they need without disturbing everything else.
You can reuse sturdy cardboard magazine files or even make simple holders from suitable boxes rather than buying new ones.
This system also makes it easier to notice when paper is running low instead of discovering an empty pack in the middle of a project.
7. Create a Grab-and-Go Craft Caddy
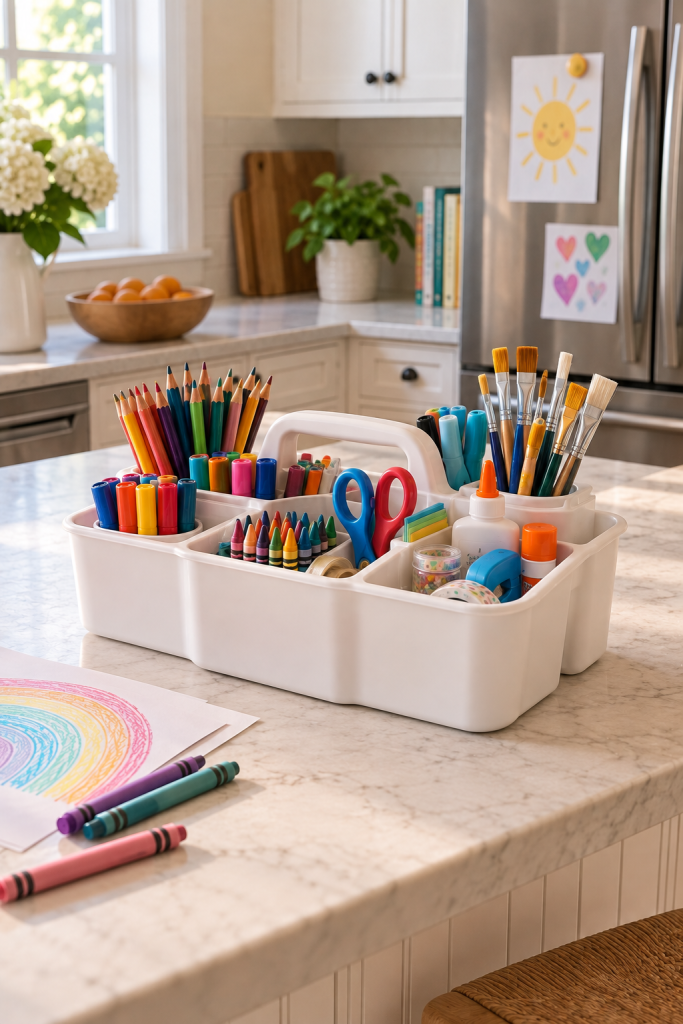
Not every home needs a permanent craft station. If your children usually draw or make things at the dining or kitchen table, a portable caddy may be all you need.
Choose a handled cleaning caddy, divided tote, or small toolbox and fill it with everyday supplies such as crayons, washable markers, pencils, glue sticks, child-safe scissors, and tape.
When children want to create something, carry out one container instead of opening several drawers and cupboards.
Once they finish, everything goes back into the same caddy and can be stored in a cabinet or closet.
This is one of the easiest budget-friendly kids craft storage ideas, especially if you already have a suitable container at home.
8. Hang Small Buckets From a Rail
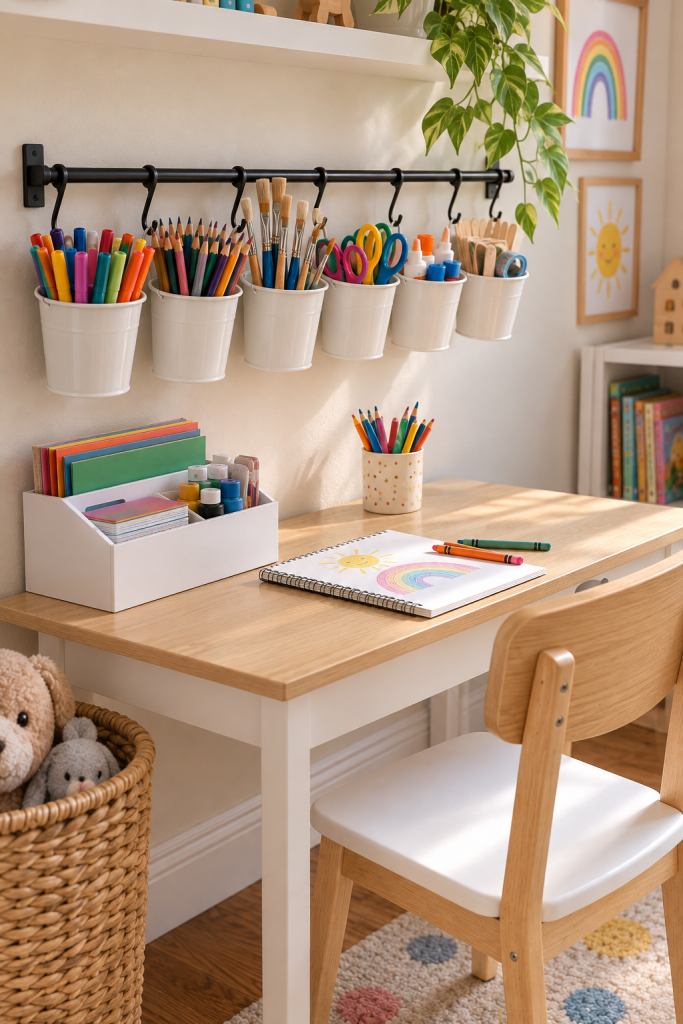
A wall rail with removable buckets can turn a narrow strip of wall into useful craft storage.
Hang several small containers from the rail and give each one a clear purpose. One might hold markers, another brushes, another glue sticks, and another craft sticks or rulers.
This setup keeps frequently used supplies off the table while still leaving them visible. The buckets can also be removed and carried to the table during a project.
Install the rail near the craft area but make sure it is securely attached to the wall.
If you want the storage to be easy for children to manage, avoid filling every bucket to the top. A few clearly separated categories are easier to maintain than lots of tiny ones.
9. Use a Divided Organizer for Tiny Craft Supplies
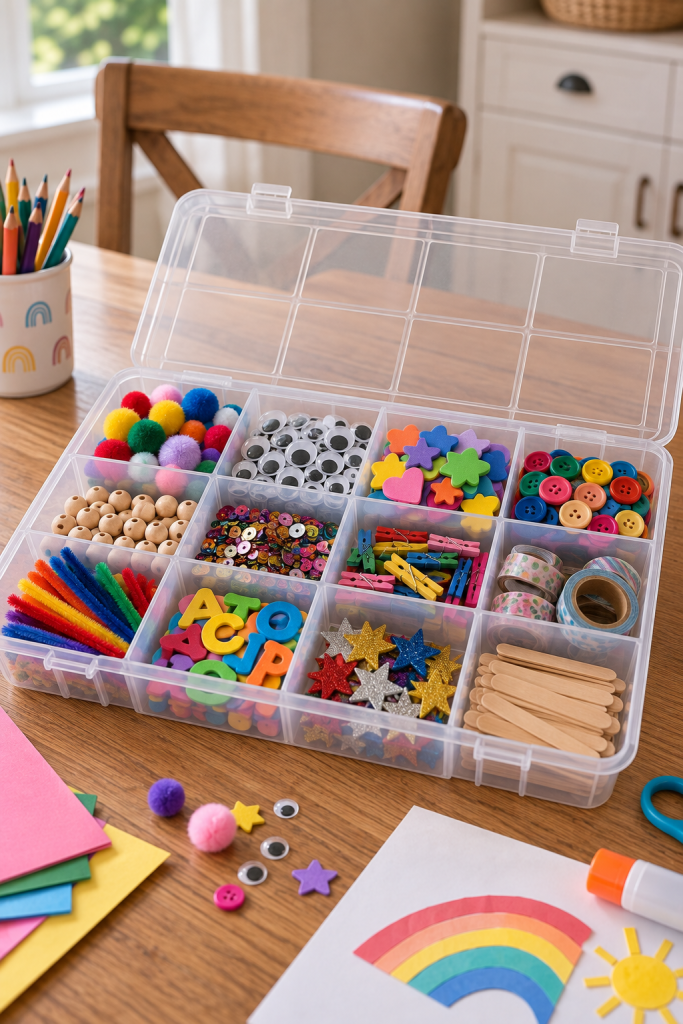
Beads, buttons, googly eyes, pom-poms, sequins, and other small craft pieces need a different storage solution from paper and markers.
A divided craft box, tackle-style organizer, or reused compartment tray keeps these tiny items separated. Clear compartments make it easy to find a particular color or material without emptying everything onto the table.
Choose a container with a secure lid if it will be moved around.
Small craft pieces can be choking hazards, so this type of organizer should be kept out of reach when younger children are in the home. Bring it out only when an age-appropriate project calls for those materials.
This prevents both messy spills and small pieces from disappearing around the room.
10. Add Cube Storage With Removable Baskets
Cube shelves are useful when you need to organize both large and small craft materials in one place.
Instead of filling every cube with loose supplies, add baskets or bins and assign each one a broad category. You could have separate baskets for painting, paper crafts, coloring, recycled craft materials, and works in progress.
The baskets make cleanup faster because children do not have to put every tiny item into a perfect position. They simply return it to the correct category.
Keep the most-used baskets in lower cubes and less-used supplies higher up.
You don’t need a large unit either. A small two- or four-cube shelf can create plenty of storage in a bedroom or playroom corner.
11. Store Artwork in a Simple File Box
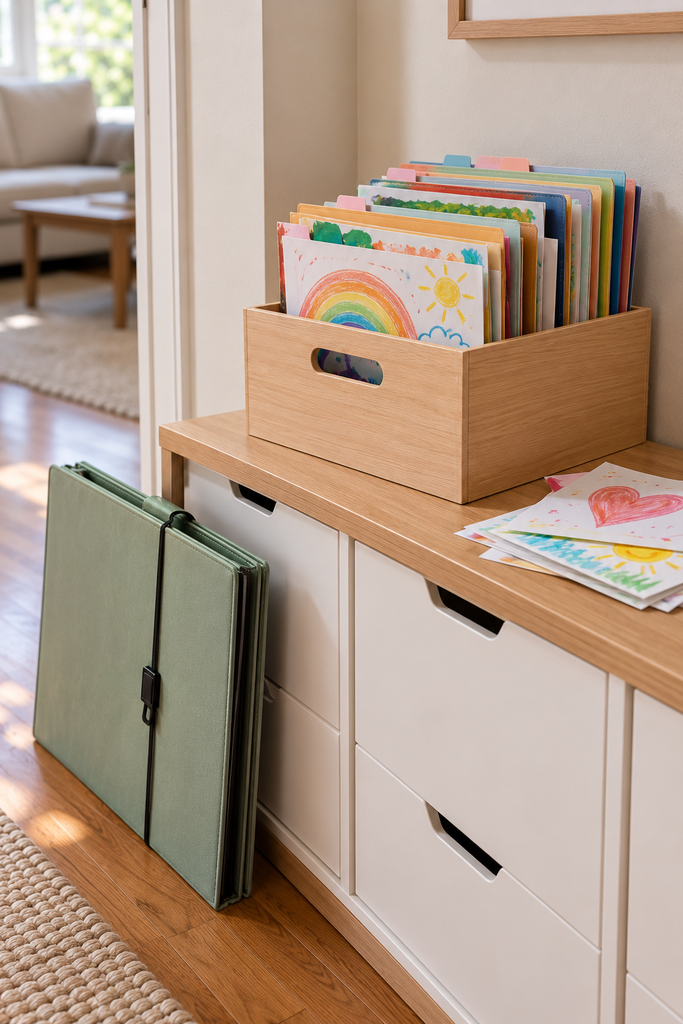
Craft storage is not only about unused supplies. Finished drawings and paintings can quickly create another pile of clutter.
Use a file box, document case, or expanding folder to create a simple home for artwork worth keeping. Add a folder for each child, school year, or type of project.
When a new picture comes home or a craft is finished, decide whether it should be displayed, recycled, or saved. The pieces you want to keep can go straight into the file instead of sitting on the counter for weeks.
For oversized artwork, use a large flat portfolio folder or shallow under-bed box.
12. Slide a Shallow Craft Box Under the Bed
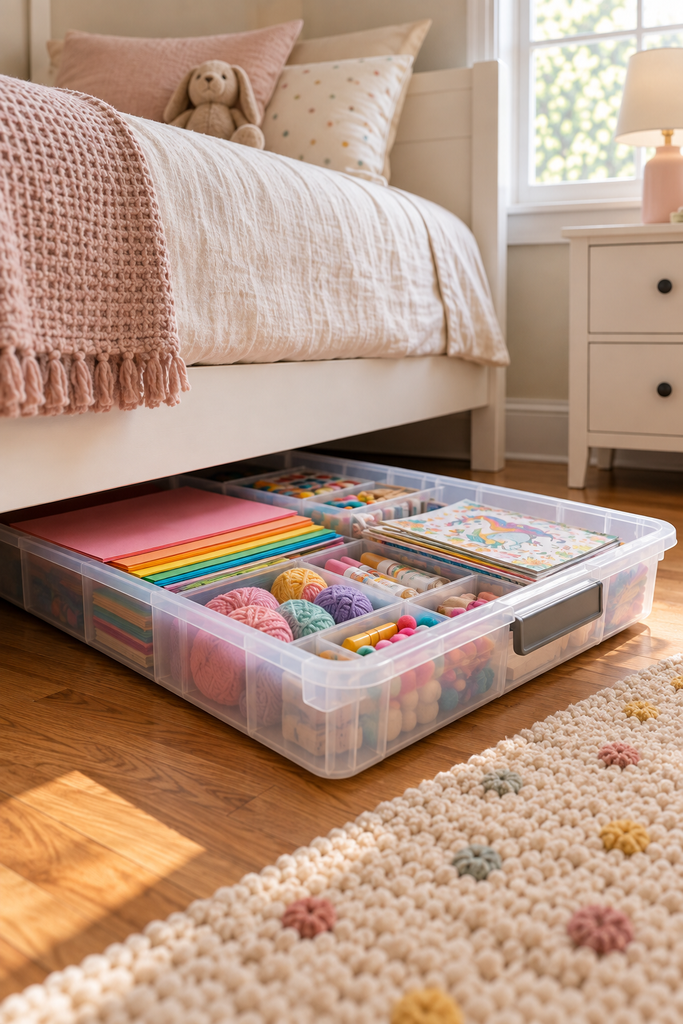
Under-bed space can be useful when a bedroom or playroom has very little visible storage.
Choose a shallow lidded box that slides easily beneath the bed. Use it for larger or less frequently used supplies such as extra construction paper, felt sheets, yarn, craft kits, coloring books, and spare materials.
Small containers inside the box can stop different supplies from mixing together.
This isn’t the best location for materials children use several times a day because pulling out a large box repeatedly can become annoying. Instead, use it as backup storage and keep everyday crayons and markers somewhere easier to reach.
13. Create a Hanging Art Supply Station With a Tension Rod
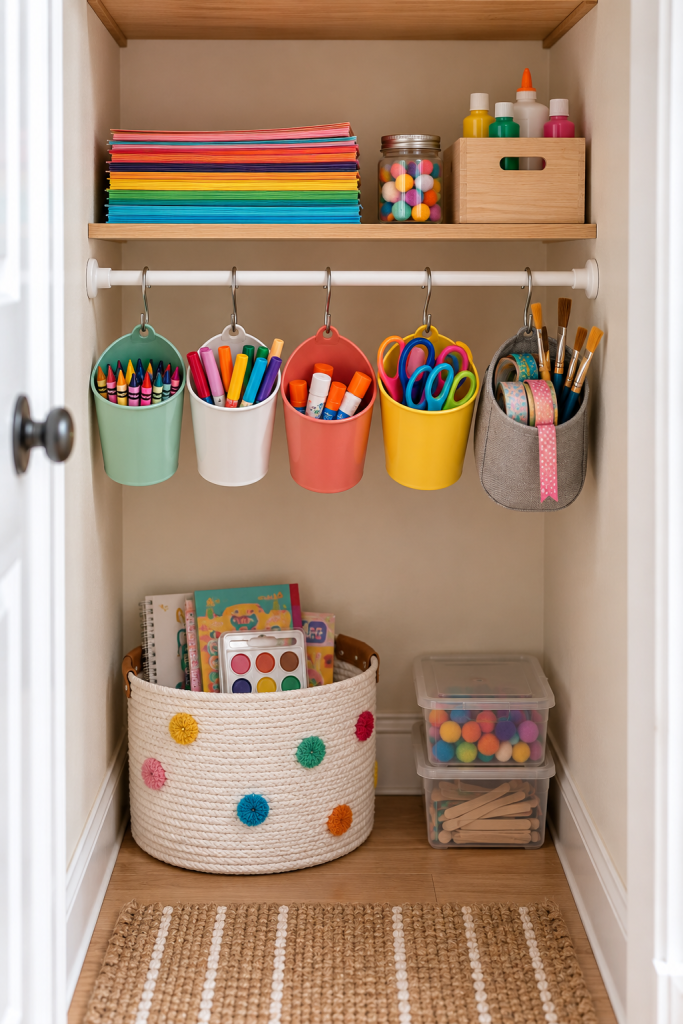
A tension rod can turn an unused nook, the space between two cabinets, or the inside of a wide closet into simple craft storage. Hang lightweight buckets or small fabric pouches from S-hooks and use them for crayons, markers, glue sticks, ribbon, and other everyday supplies.
Because the containers hang instead of sitting on furniture, this works especially well when floor and shelf space are limited. Keep the rod at a practical height if children will use the supplies themselves.
14. Turn a Drawer Into a Hidden Craft Station
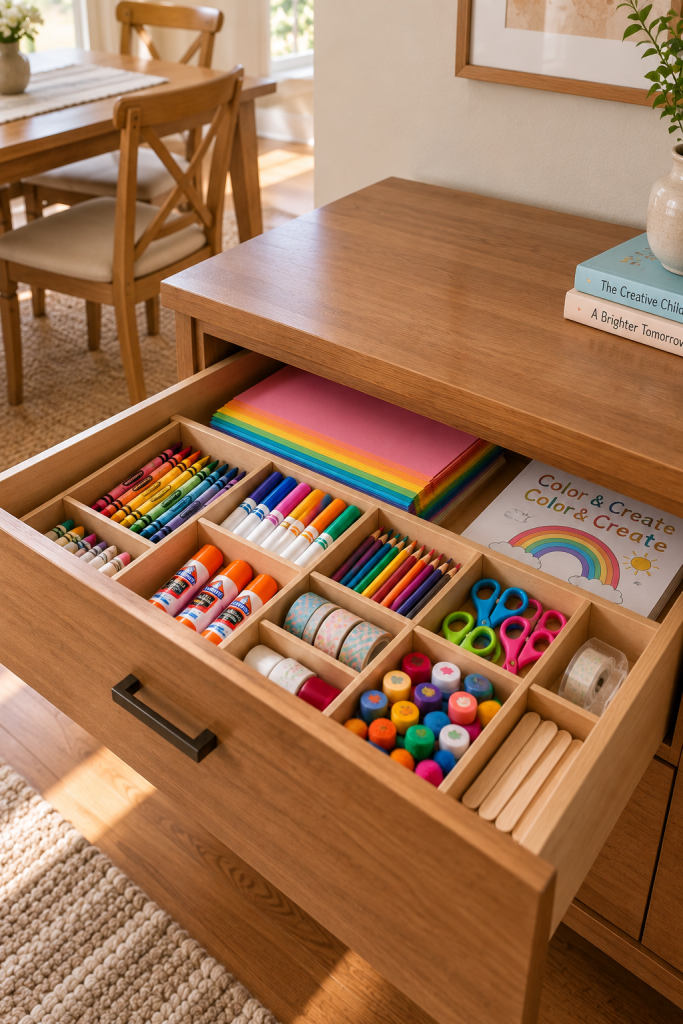
If you want craft supplies completely out of sight after playtime, dedicate one wide drawer in a dresser, sideboard, or kitchen cabinet to children’s art materials.
Place inexpensive dividers or small reused boxes inside the drawer to separate crayons, markers, glue sticks, tape, child-safe scissors, stamps, and other everyday supplies. Keep drawing paper in a larger section at the back.
The advantage is that nothing needs to stay on display. Children can open one drawer when they want to create and close it when they’re finished. This works particularly well when crafts happen at the dining table and there is no dedicated playroom.
Conclusion
Organizing kids’ craft supplies does not require a dedicated craft room or an expensive storage system. The most useful setup is usually the one that matches where your children actually create and what they use most often.
Start with the biggest source of clutter. If paper is always scattered around, try magazine holders. If small supplies cover the table, add drawers or a pegboard. If crafts happen in different rooms, a rolling cart or portable caddy may solve the problem better than permanent shelving.
You also do not need to organize every single item into a separate container. A few clear categories are often easier for children to understand and maintain.
Most importantly, keep everyday, age-appropriate materials within easy reach and store supplies that require supervision separately. A good kids craft storage system should make creativity easier—not make children afraid to touch the perfectly organized supplies.
Frequently Asked Questions
What is the easiest way to organize kids’ craft supplies?
Start by grouping supplies according to how children actually use them. Keep crayons and markers together, paper in one area, painting supplies together, and tiny craft pieces in a separate container. Use simple labels or picture labels so children can see where everything belongs. Avoid creating too many categories because complicated systems are harder for kids to maintain.
How can I organize kids’ craft supplies on a small budget?
Reuse containers before buying new organizers. Shoe organizers, food containers, magazine holders, shoeboxes, cleaning caddies, jars, and small baskets can all become useful craft storage. Spend money only where a purchased solution solves a real problem, such as adding vertical pegboard storage when you have very little floor space.
How do you store kids’ craft supplies in a small space?
Use areas that normally go unused. An over-the-door organizer uses the back of a door, a pegboard uses wall space, stackable drawers use vertical space, and shallow boxes can fit under a bed. A portable caddy is another good option because it can be stored in a cabinet when craft time is over.
How can I make it easier for kids to clean up their own craft supplies?
Keep the system simple and place everyday supplies where children can reach them. Use broad categories instead of giving every object its own tiny compartment. Labels with both words and pictures can help younger children understand where supplies belong. Open baskets and easy-to-pull drawers can also make cleanup less frustrating.
Where should I store scissors, glue, paint, beads, and other messy or small supplies?
Storage should depend on the child’s age and the material. Age-appropriate washable supplies may be kept in accessible containers, while sharp tools, strong adhesives, permanent markers, paints requiring supervision, and small pieces that could present a choking risk should be stored where an adult can control access. This lets children use their everyday craft area independently without making every supply freely accessible.