Published On:
14 Kids Craft Storage Ideas to Organize and Maximize Space Efficiently
Share:
Kids often have many craft supplies that can quickly create a mess. Organizing these materials helps keep the space tidy and makes it easier for children to find what they need. Parents and caregivers want solutions that are simple, practical, and encourage creativity.
Effective craft storage ideas make it easier to manage supplies while keeping the area neat and inviting. These ideas can work in any home and help create a dedicated space where kids enjoy making art without the chaos.
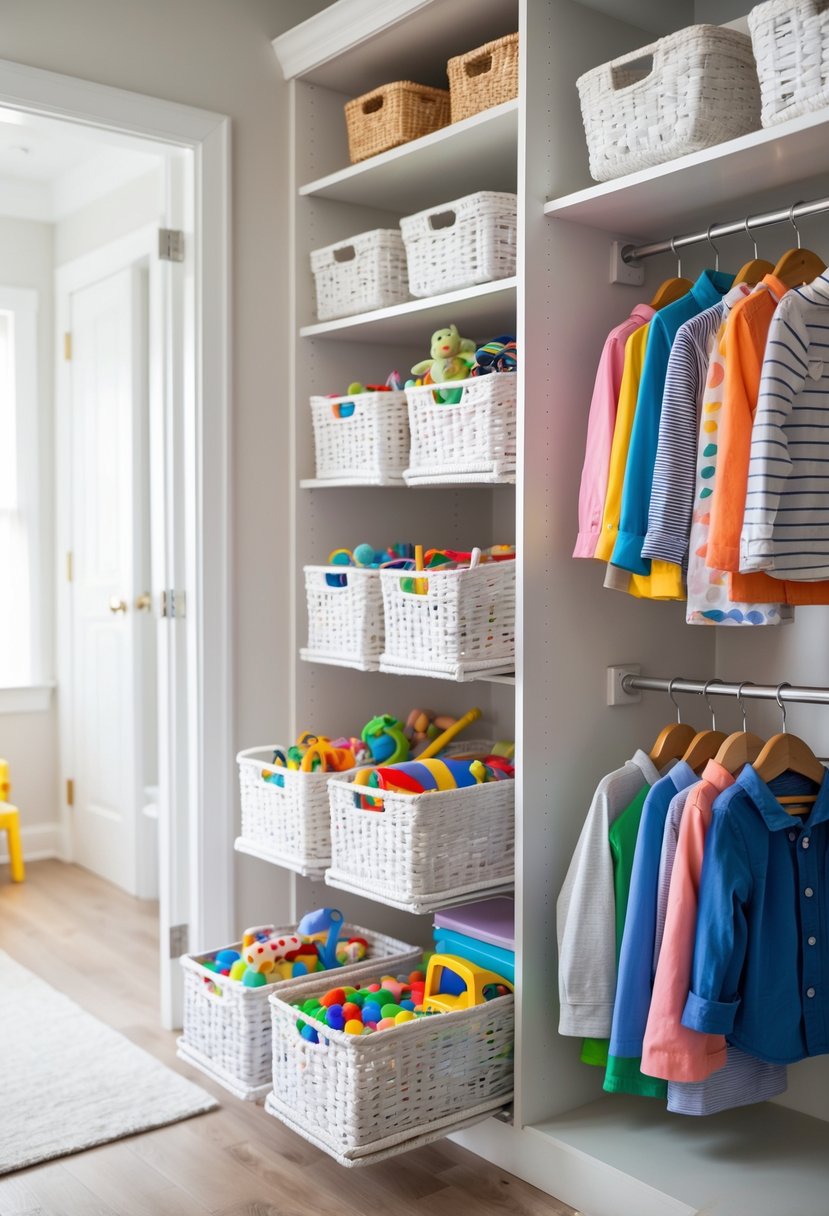
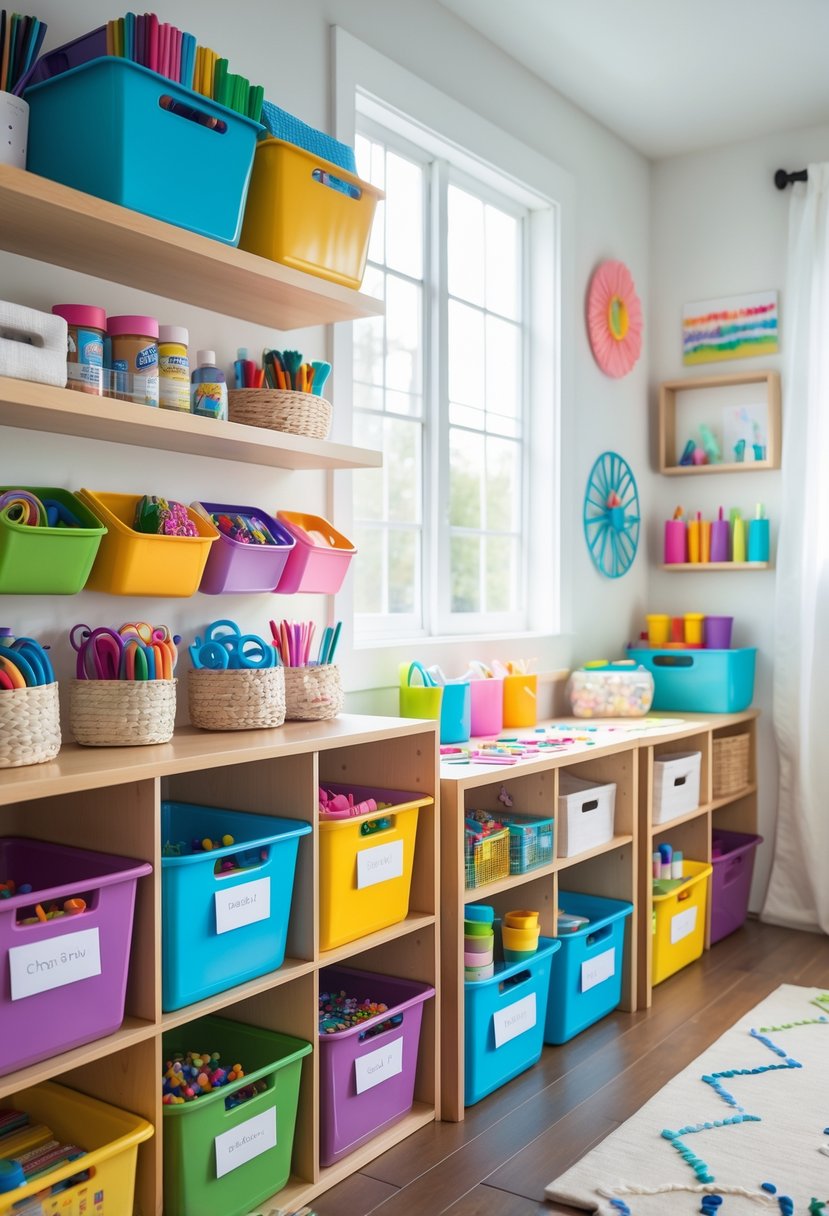
1) Use clear plastic bins with labels for each type of supply
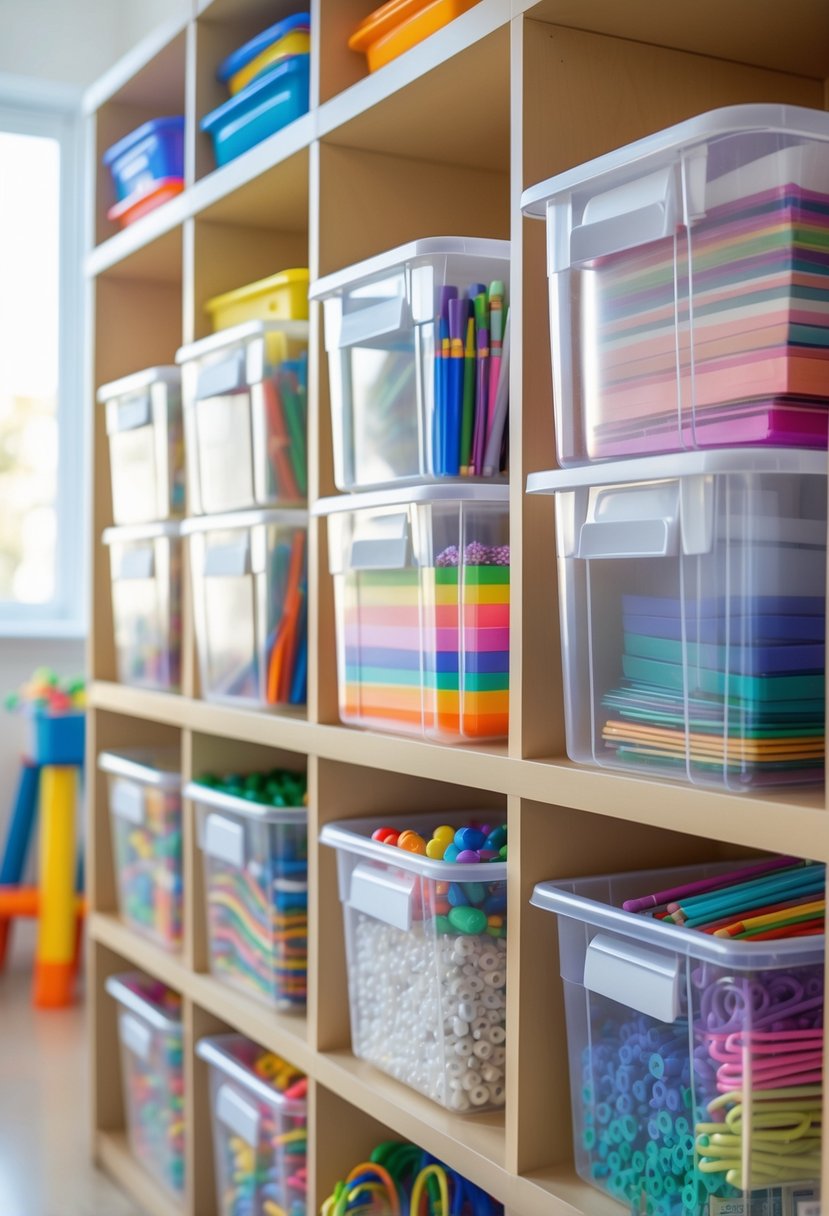
Clear plastic bins help keep craft supplies visible and easy to find. They let kids quickly spot what they need without digging through piles.
Labeling each bin adds order and makes cleanup faster. Labels can show what goes in each container, like markers, paper, or beads.
This method works well in small spaces, such as closets or shelves. It keeps supplies tidy and encourages kids to put things away properly.
2) Install wall-mounted pegboards for hanging scissors and brushes
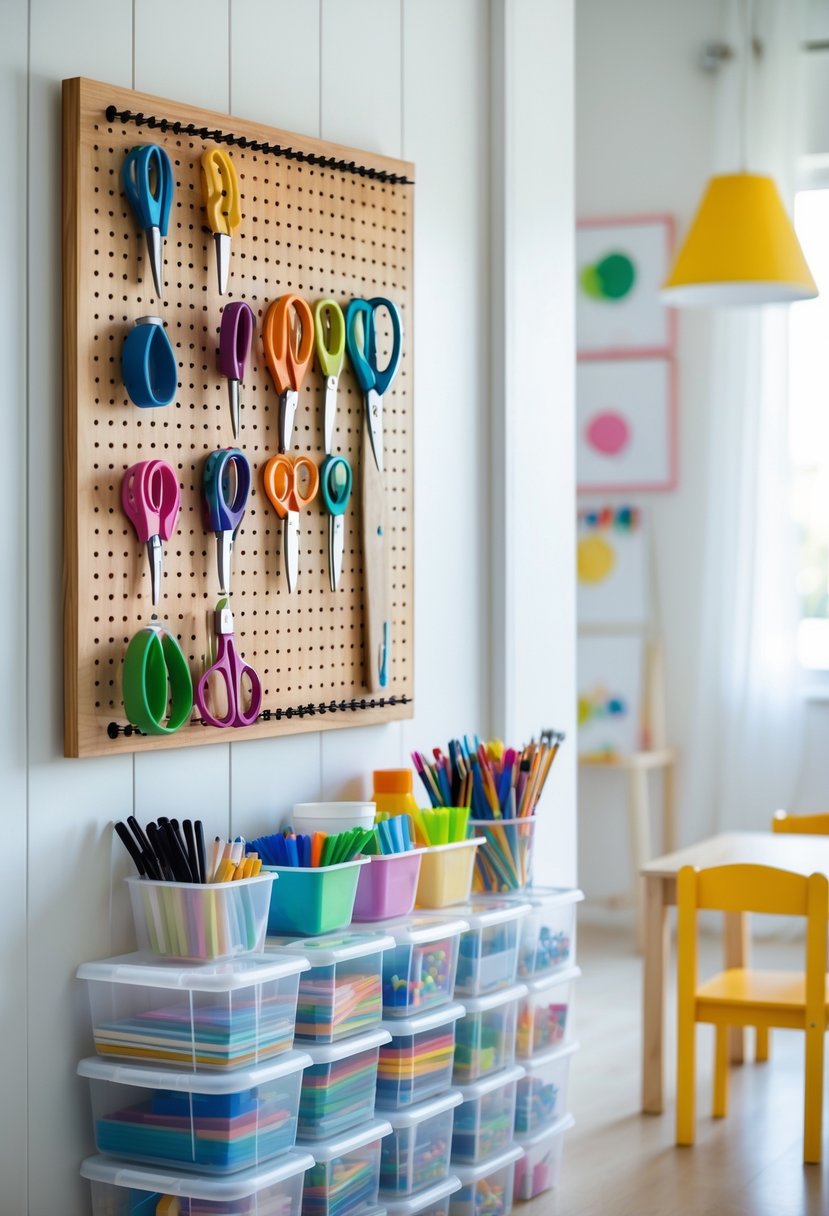
Pegboards offer a simple way to keep craft tools like scissors and brushes organized. They mount on walls, freeing up table space and making items easy to reach.
Using hooks or small containers, pegboards hold supplies clearly in sight. This reduces clutter and helps kids find what they need quickly.
They can be installed at a comfortable height, making it safe and convenient for children to use. Pegboards also allow for flexible arrangement as storage needs change.
3) Repurpose a shoe organizer to store markers and glue sticks
A hanging shoe organizer works well for keeping markers and glue sticks in order. Each pocket holds these small items separately, making them easy to find.
Placing the organizer on a door saves space and keeps supplies within reach. It also helps prevent clutter on desks or craft tables.
This method suits both children and adults. It keeps craft areas neat and makes cleanup faster.
4) Create a rotating art cart with tiered shelves
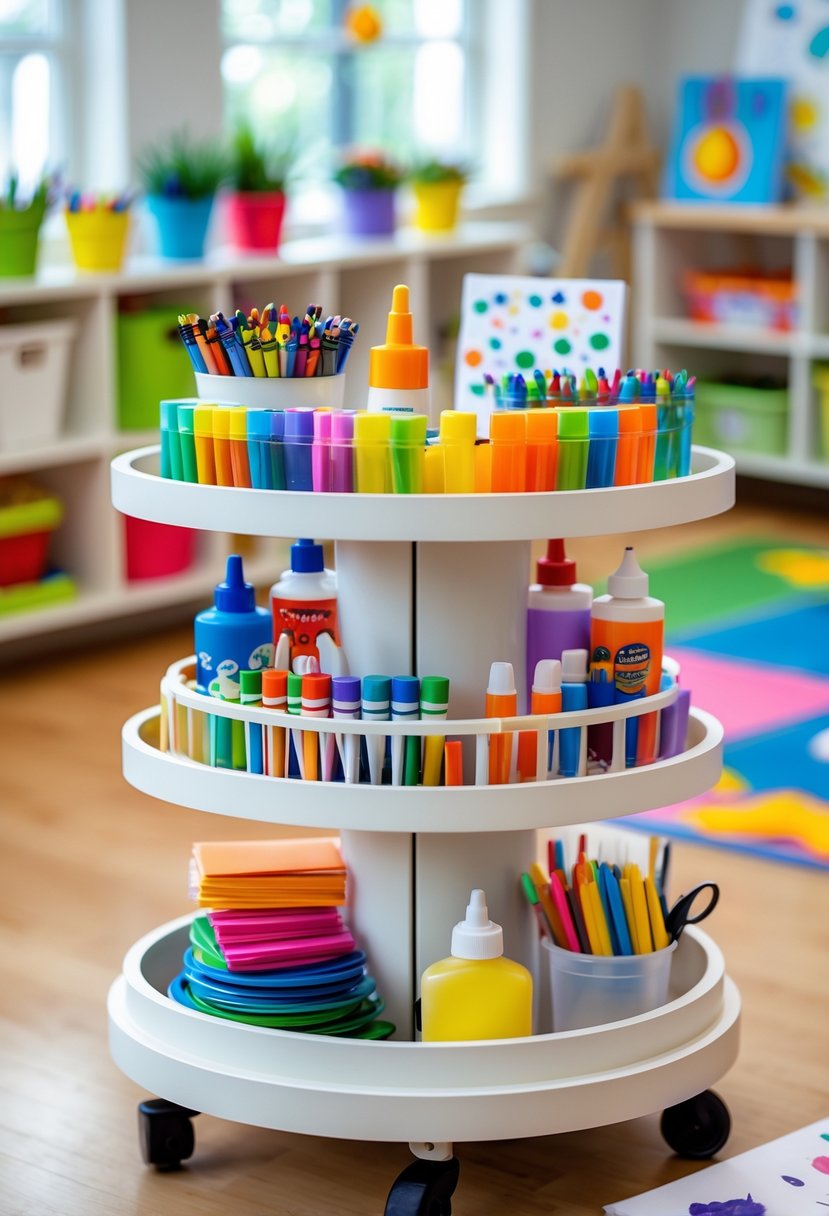
A rotating art cart with tiered shelves helps keep supplies organized and easy to reach. The tiers allow for sorting items by type, like markers on one level and paper on another.
This kind of cart is also mobile, so kids can move it around easily. The rotation feature makes it simple to access everything without having to dig through piles.
Using clear containers or bins on the shelves adds extra organization. It helps kids find what they need quickly, keeping their creative space tidy.
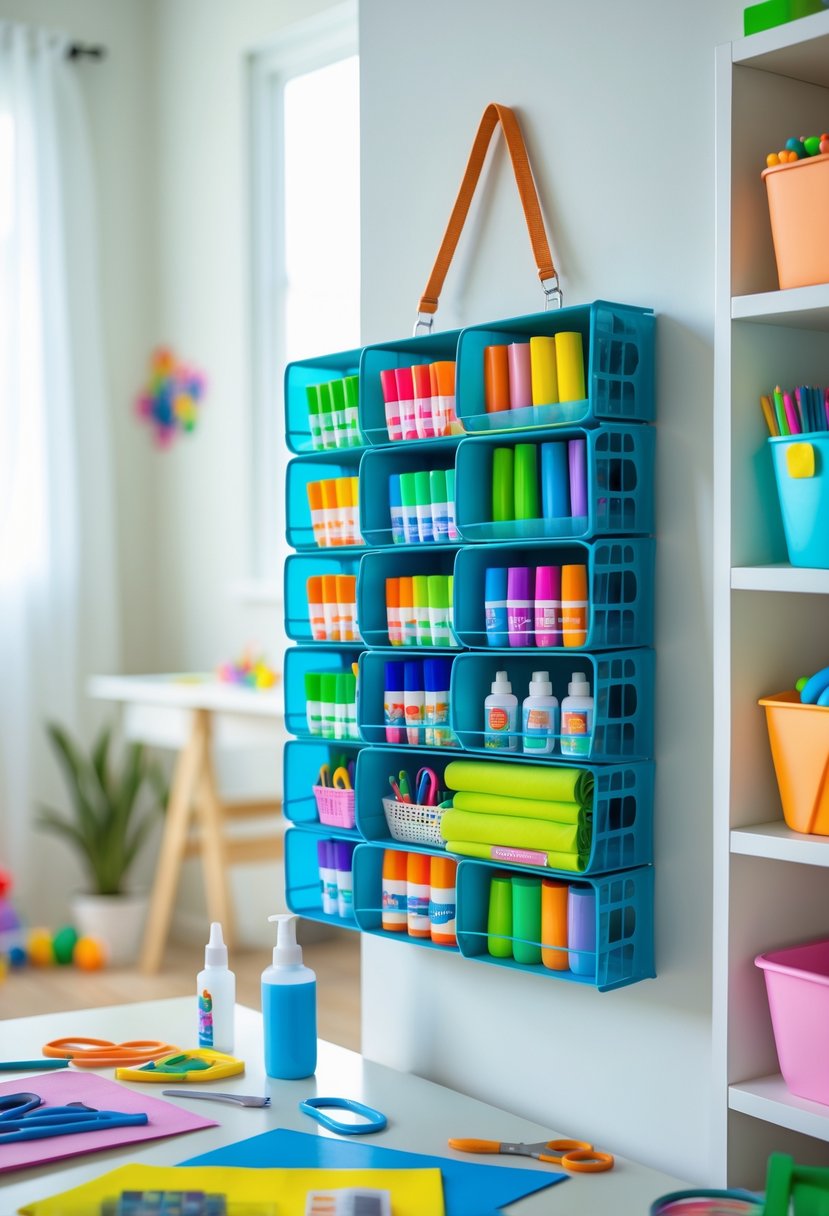
5) Use magnetic strips to hold metal tools like scissors
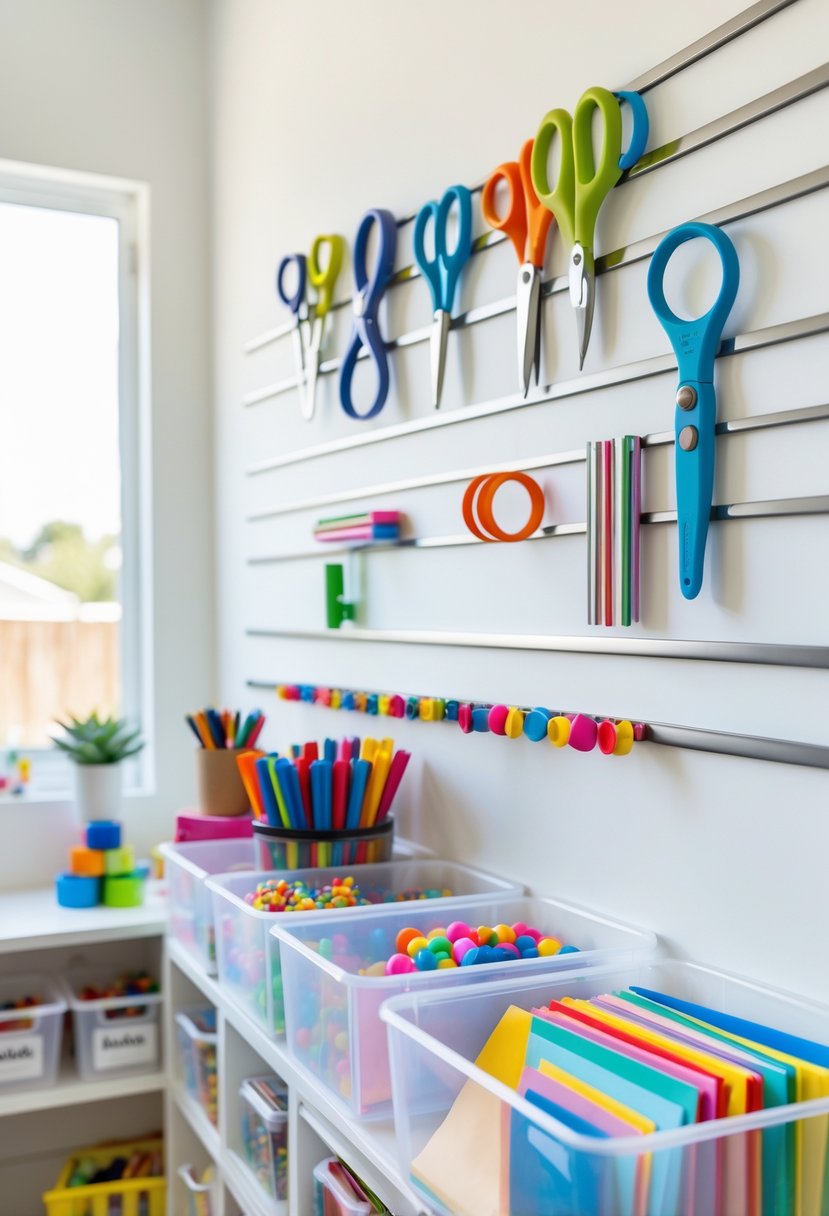
Magnetic strips are a simple way to store metal tools like scissors. They keep these items visible and easy to reach.
By mounting a magnetic strip on a wall, children can quickly grab what they need without digging through drawers. This also helps keep the workspace tidy.
This method works well in craft rooms or classrooms. It prevents tools from getting lost and adds safety by keeping sharp objects off surfaces.
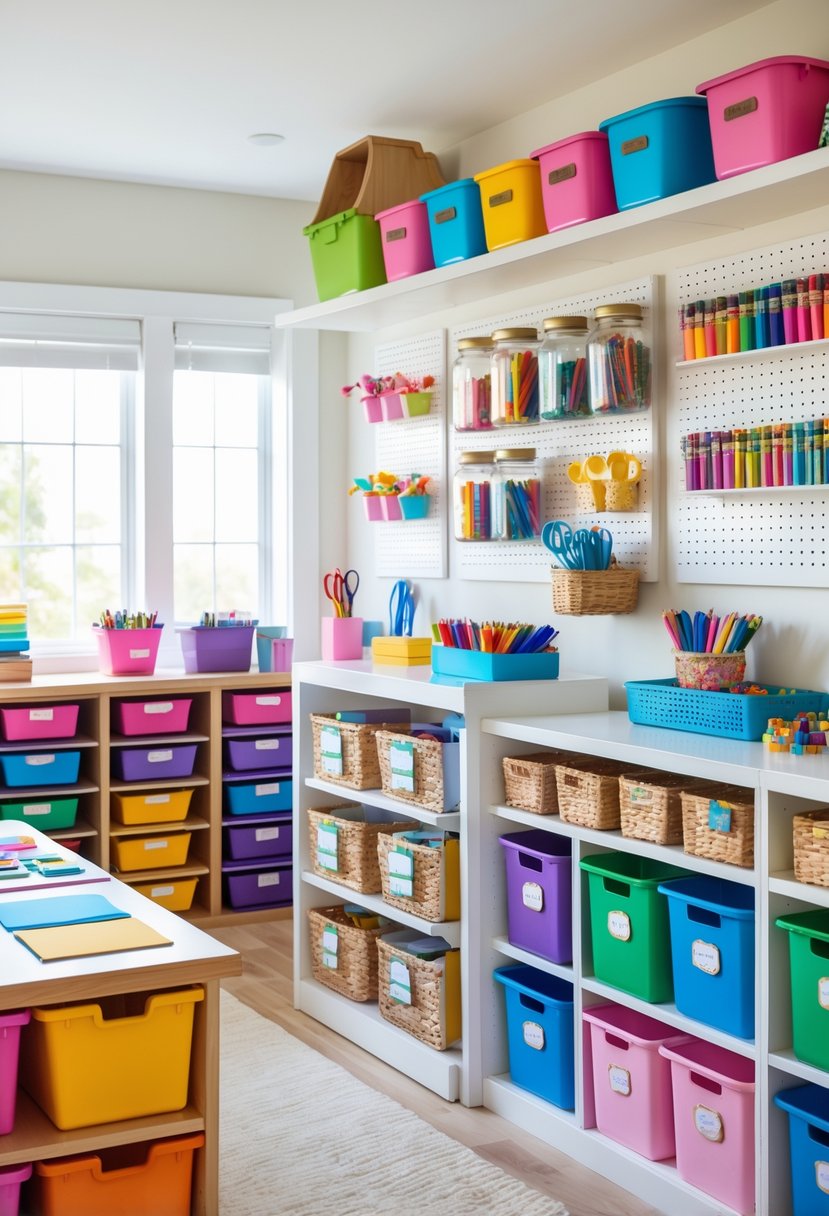
6) Stackable drawer units for easy categorization of materials
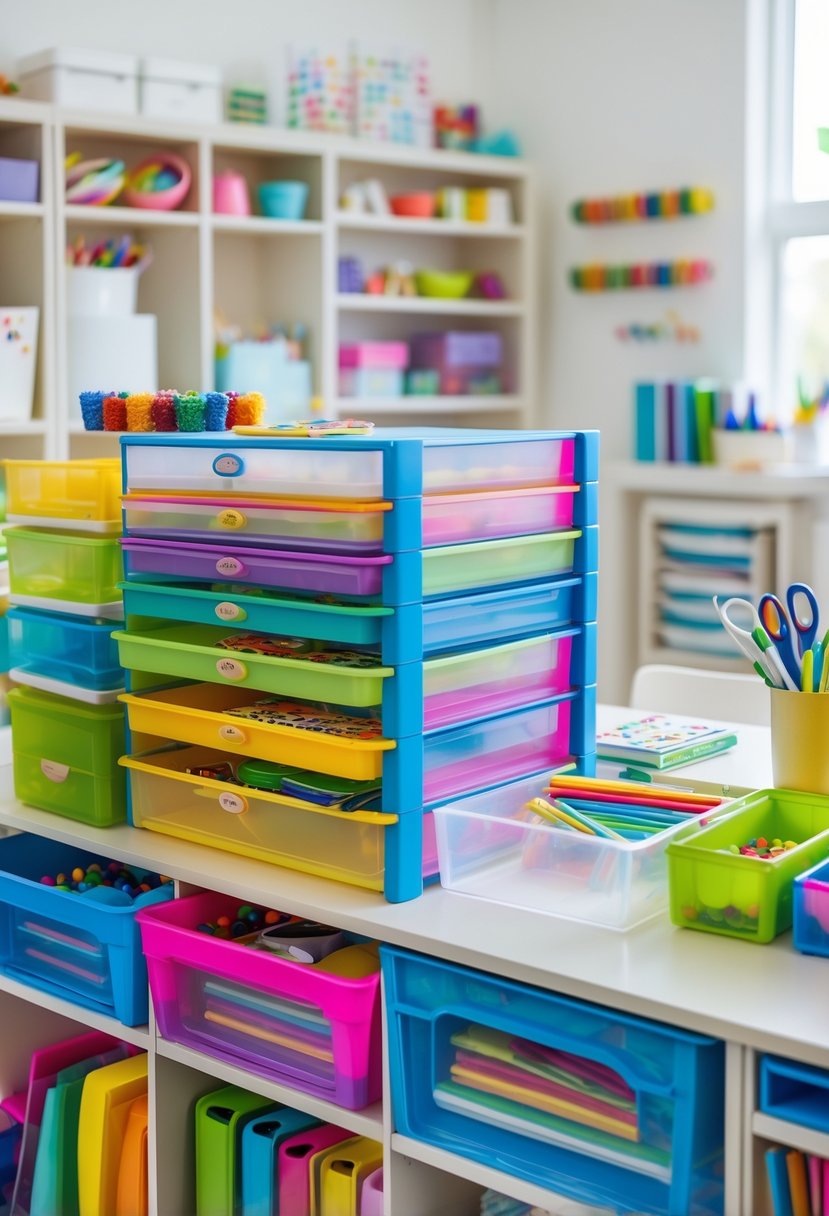
Stackable drawer units help keep craft supplies neat and sorted. Each drawer can hold a different type of material, like markers, paper, or glue. This makes it easier to find items quickly.
Clear plastic drawers are especially useful because they show what is inside. Many stackable units are lightweight and fit well on desks or shelves. They save space while allowing good organization.
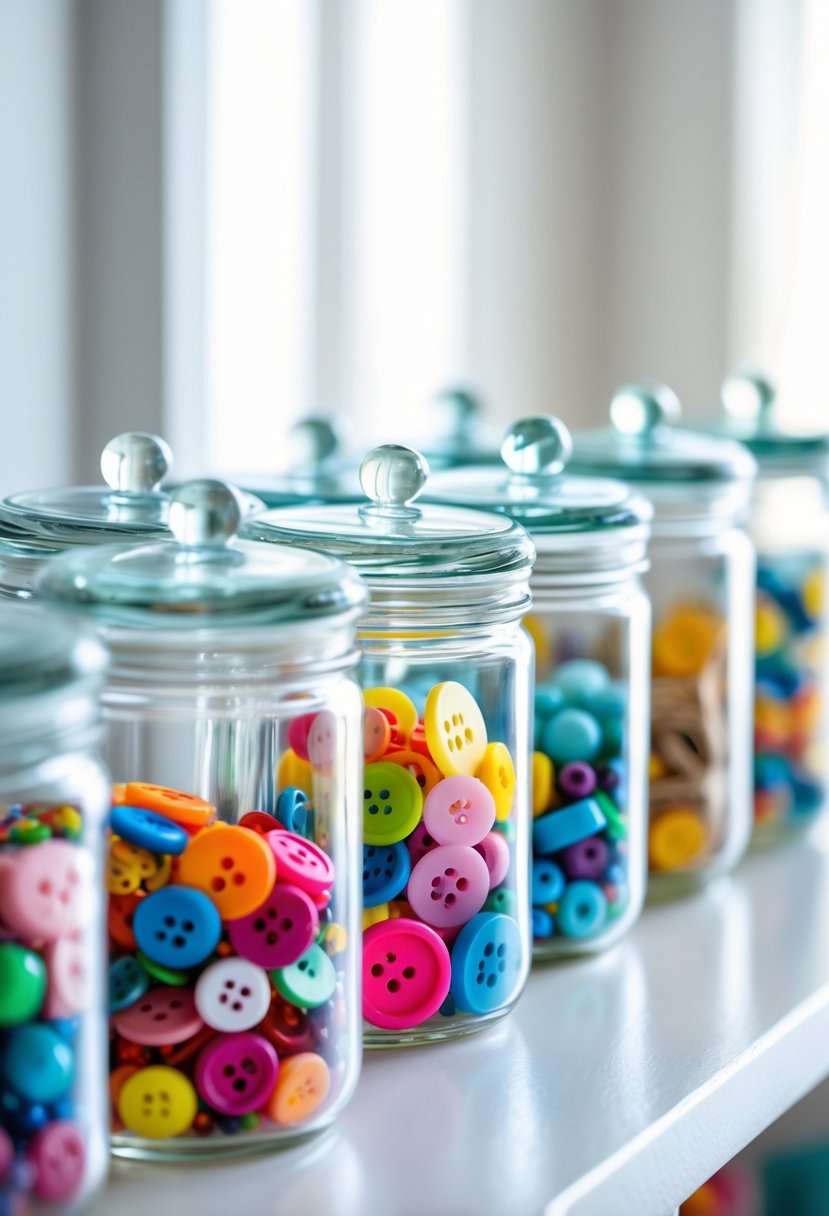
7) Incorporate mason jars for holding paintbrushes and pencils
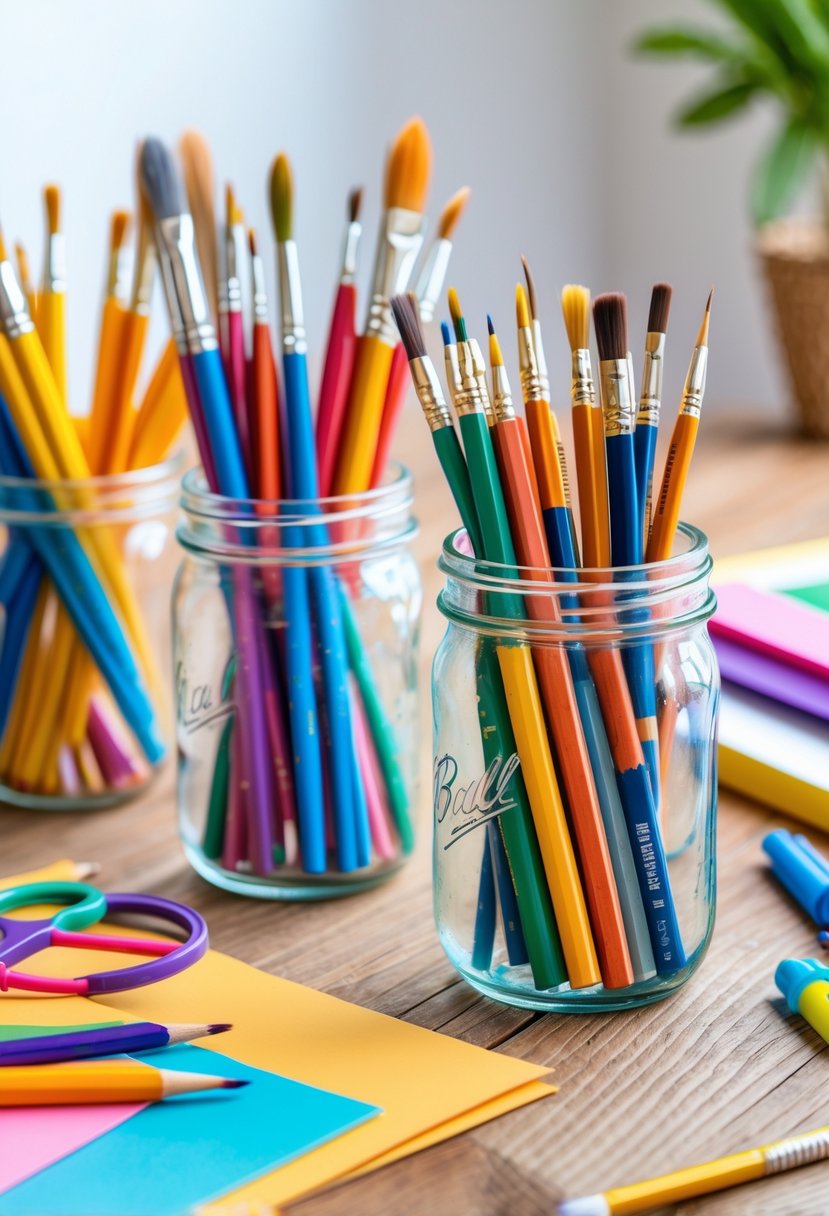
Mason jars offer a simple way to keep paintbrushes and pencils organized. They come in various sizes to hold different supplies neatly.
Using mason jars makes it easy for kids to find what they need quickly. Decorating the jars can also add a fun touch to the craft space.
They can be placed on desks or shelves for easy access. This method helps keep the workspace tidy and tools within reach.
8) Use colorful baskets to separate craft paper by size
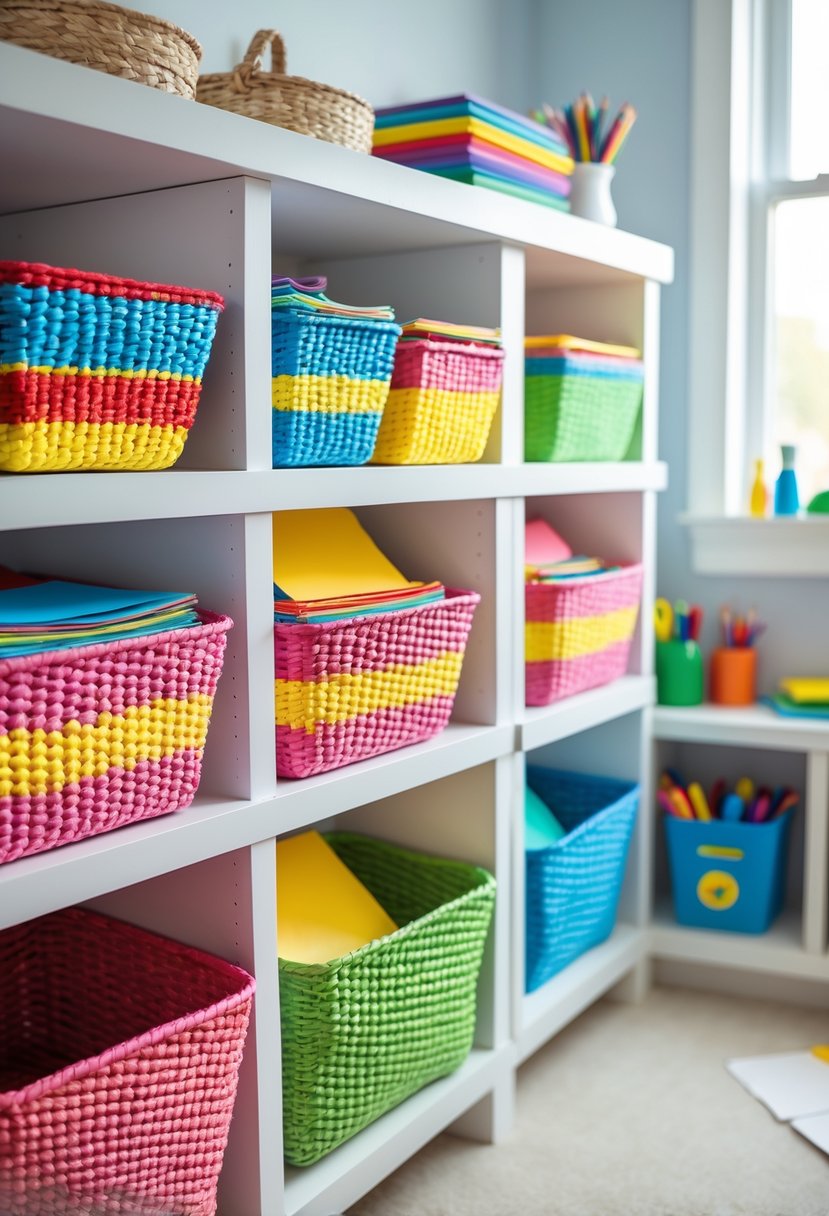
Colorful baskets help organize craft paper quickly and clearly. Each basket can hold papers of a specific size, making it easy to find the right one when needed.
This method keeps the art area neat. Kids can also learn to sort their supplies, which encourages tidiness. Plus, bright baskets add a fun look to the space while serving a practical purpose.
9) Add a rolling caddy with compartments for varied supplies

A rolling caddy with compartments helps keep different art supplies organized in one place. It often includes drawers or bins of various sizes to hold brushes, paints, paper, and small parts separately.
Because it has wheels, the caddy can easily move between rooms or workspaces. This makes it convenient for kids to access their materials wherever they want to create.
Adjustable compartments add flexibility, allowing storage to adapt as supplies change. This makes the caddy useful for a wide range of craft tools and materials.
10) Utilize clear craft jars with screw-on lids for beads and buttons
Clear craft jars with screw-on lids help keep small items like beads and buttons organized. The transparent sides make it easy to see the contents without opening the jar.
They also protect supplies from dust and spills, keeping everything clean and secure. These jars come in various sizes, fitting well on shelves or in drawers.
Using screw-on lids prevents accidental openings, making them a good choice for kids’ craft spaces. This simple storage option helps save time and reduces clutter.
11) Install floating shelves to display finished projects and store supplies
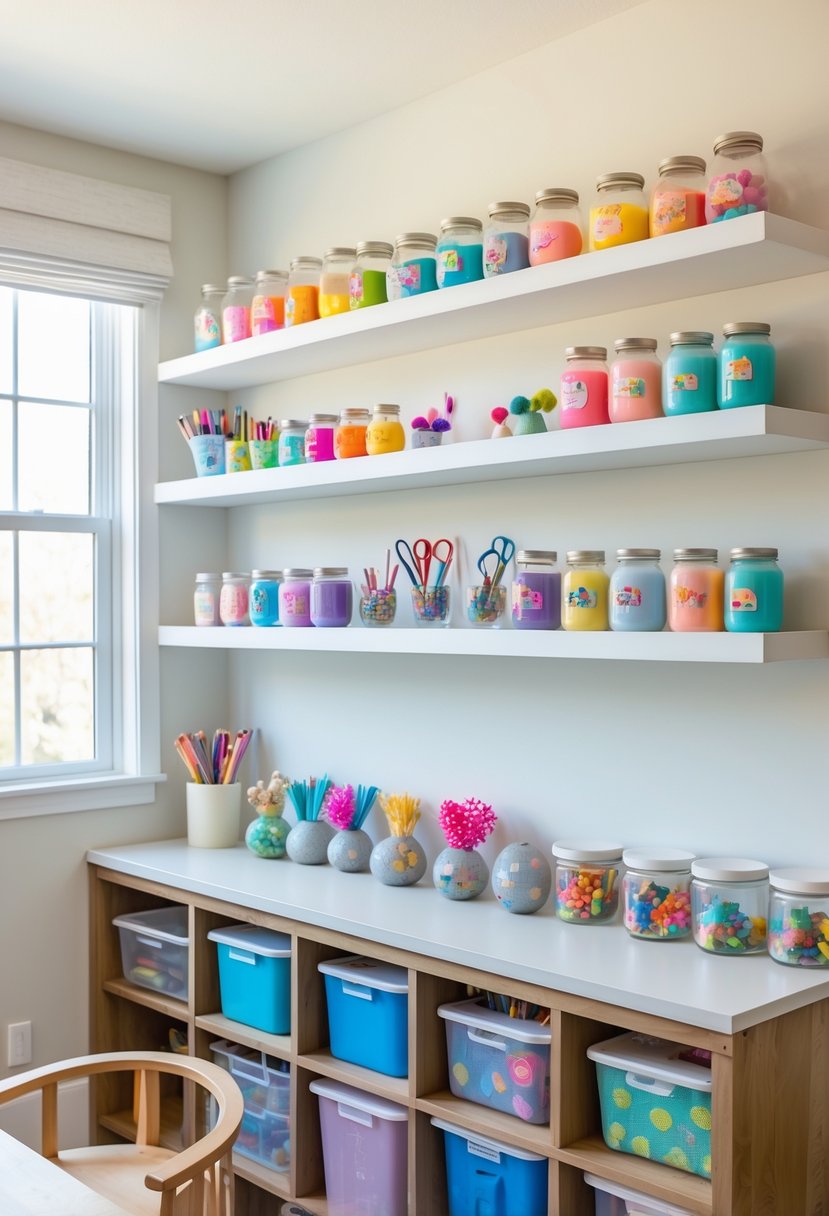
Floating shelves offer a simple way to organize craft spaces. They provide extra display space for finished projects, keeping them visible and out of the way.
These shelves can also hold supplies like markers, glue, and paper. Because they don’t need visible brackets, they keep walls looking clean and neat.
Installing floating shelves is a quick task that uses minimal tools. This makes them a practical choice for kids’ craft rooms or play areas.
12) Use file organizers to sort coloring books and scrapbooking paper
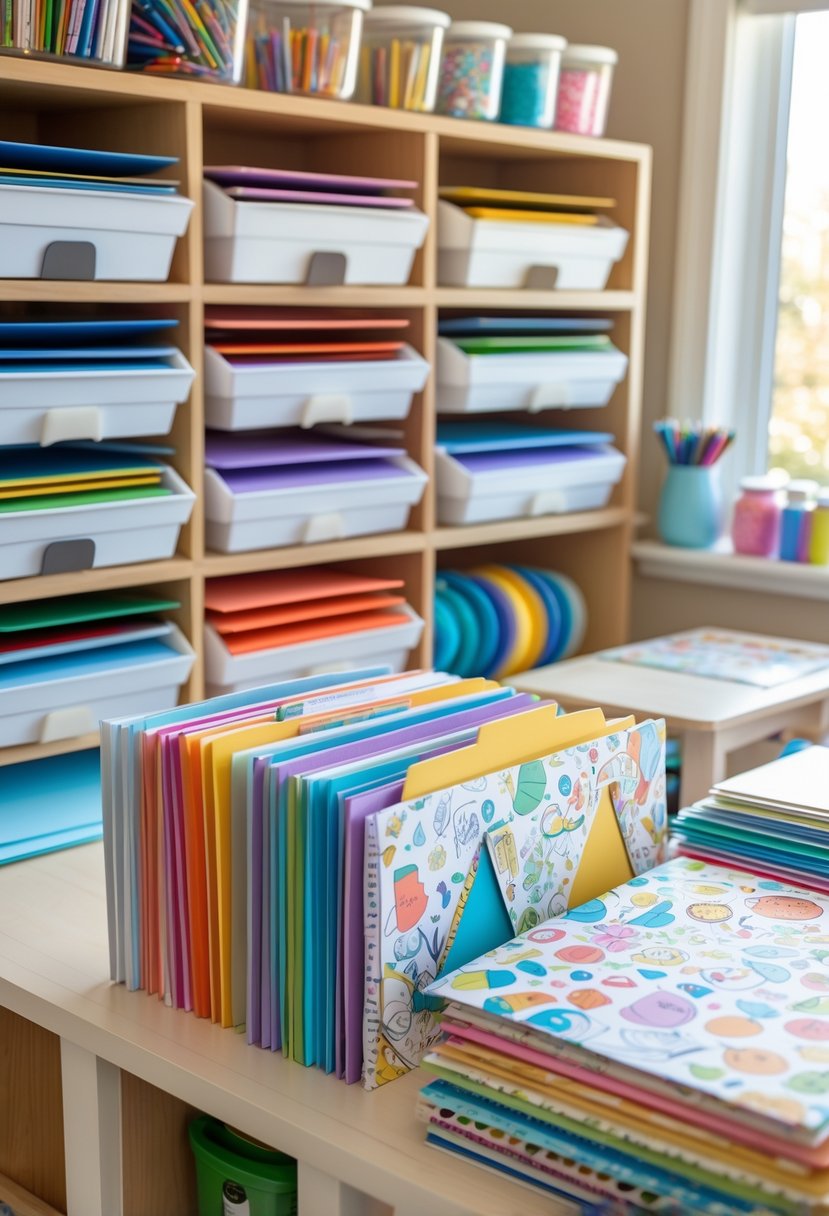
File organizers are a simple way to keep coloring books and scrapbooking paper tidy. They help separate different types and sizes, making it easier to find what is needed.
Using them can prevent paper from getting bent or damaged. Labels can be added to each slot for quick identification.
This method works well in drawers or on shelves, saving space and reducing clutter in craft areas.
13) Create a chalkboard wall for notes and supply lists
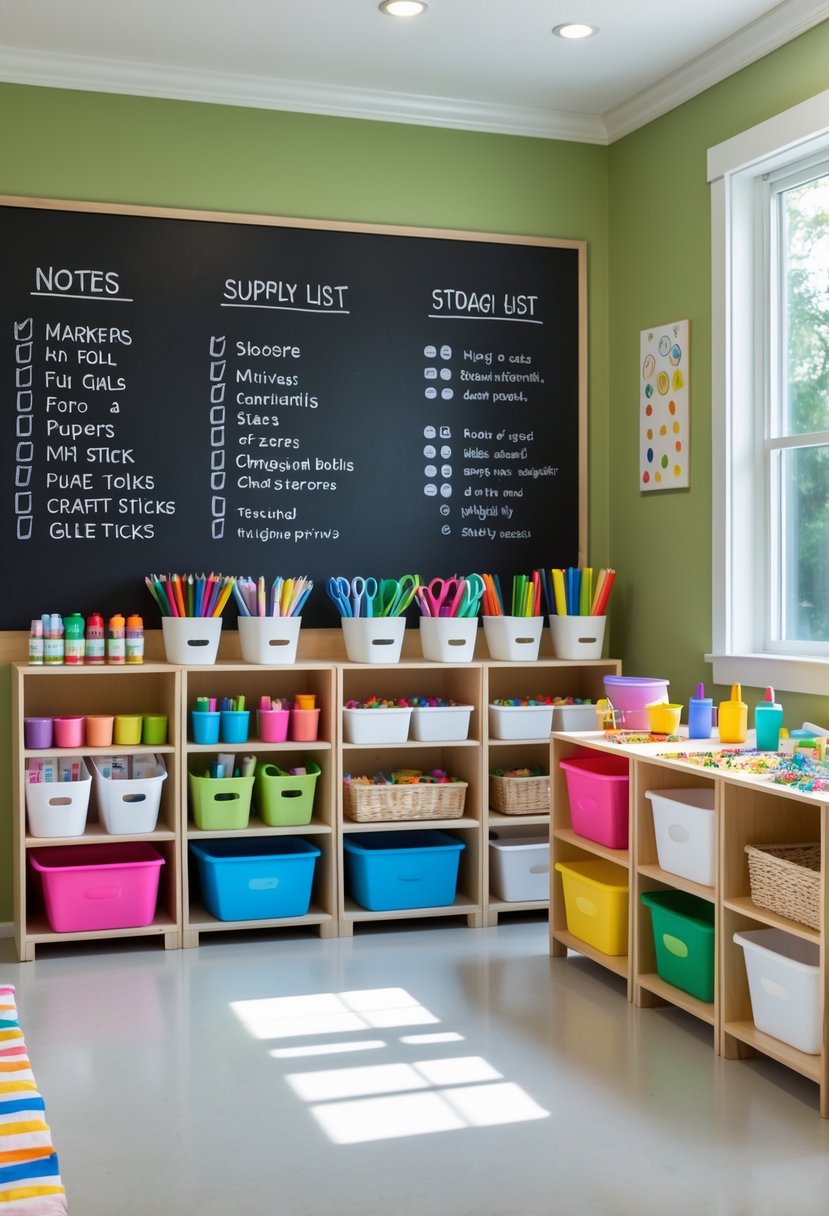
A chalkboard wall is a practical way to keep track of craft supplies and reminders. It offers a large, reusable space where lists and notes can be written and erased easily.
This wall can be placed near the craft area for quick access. It helps reduce clutter by keeping important information visible and organized.
Using chalkboard paint, any wall can turn into a writable surface. It encourages creativity and helps manage craft supplies efficiently.
14) Label everything to encourage kids to put items back
Labeling storage bins and shelves helps kids know exactly where each item belongs. Clear labels make it easier for them to clean up on their own.
Using pictures along with words can help younger children understand where things go. This simple step promotes responsibility and keeps the craft area tidy.
Labels also save time when looking for supplies. It reduces clutter because kids are more likely to put things back correctly.
Frequently Asked Questions
Keeping kids’ craft supplies organized can be simple with the right tools and techniques. Clear bins, wall-mounted pegboards, and repurposed household items often help keep materials neat and easy to find. There are options that work well for small spaces, tight budgets, and hands-on DIY projects.
What are the best ways to organize kids’ art supplies in a small space?
Clear plastic bins with labels are ideal for small spaces because they stack easily and keep supplies visible. Wall-mounted pegboards help free up surface areas while keeping scissors, brushes, and other tools within reach. Using vertical space allows for more storage without cluttering the floor.
How can I create a budget-friendly craft storage setup for children?
Repurposing household items, like a shoe organizer, is cost-effective and organizes markers, glue sticks, and small supplies neatly. Thrift stores often have inexpensive containers or small shelves that can be customized with paint or labels. Simple clear jars or cups for brushes and pencils also save money.
Which IKEA products work well for storing kids’ craft materials?
IKEA offers several storage solutions suitable for crafts, such as the TROFAST system, which includes stackable bins and frames. The RASKOG rolling cart is another good option for a mobile art station with multiple tiers. These products combine affordability with functionality.
What are practical DIY craft storage projects I can build in a weekend?
Building a rotating art cart with tiered shelves provides easy access to supplies and can be made from plywood or repurposed crates. Magnetic strips mounted on walls can hold metal tools like scissors. Simple wooden boxes with compartments or hanging fabric pockets are also doable weekend projects.
How do I set up an easy-to-clean craft station that kids can maintain?
Using smooth, washable surfaces like laminated tabletops makes cleanup quick. Clear bins allow kids to see where things belong, encouraging them to put items back properly. Labeling containers and having a designated trash or recycling bin nearby helps maintain tidiness.
What storage solutions help keep crayons, markers, and paints sorted and accessible?
Small clear bins or drawer organizers separate crayons, markers, and paints to prevent mixing. Rolling carts with multiple trays offer easy access and portability. Using pegboards with small baskets or containers attached keeps frequently used items visible and easy to grab.